


I've done some fondant roses in the past, but these are GP and my first carnations and daisies. I say "first," even thought these are the final version of several attempts ![]()
Also of note, I had to make 100 carnations and bring them on the plane with me ![]() Ask if you want to know packaging and suitcase/cargo hold results.
Ask if you want to know packaging and suitcase/cargo hold results.
http://s13.photobucket.com/albums/a293/leighrobin/Gum%20paste%20flowers/

Yes I'd like to know about travelling with them too!! I have to bring 4 baked cakes, 4 dozen cupcakes and 3 dozen gumpaste roses on a plane in 3 weeks. How did you do it? Would you do it again? I hate myself for even having had this idea. Uggghhh
Try the link again--I changed the setting to public ![]()
As for the flowers, I used 100% gumpaste on most and fondant with tylose powder for some. The ones that were made with the fondant/tylose were a little more flexible and not so brittle, and made out better after packing/shipping. Only a few petals shattered off of the flowers, but all are still usable ![]()
Basically, I used those large 30 egg plastic trays that snap together. I placed a layer of tissue (like Kleenex, not gift tissue) over the bottom tray, set each carnation in an egg cell, then another layer of tissue on top. Then I snapped the top tray on. The snaps should be snapped through the tissues, because they will then hold or suspend the flowers and prevent movement.
Then, I placed those trays inside scrapbook containers (the ones that are on sale right now at Michael's ![]() )--because I also had a few trys of 12-egg containers too, one of those fit perfectly snug right next to the 30-egg containers inside of the scrapbook container and prevented either from moving around.
)--because I also had a few trys of 12-egg containers too, one of those fit perfectly snug right next to the 30-egg containers inside of the scrapbook container and prevented either from moving around.
On top of that, I tucked my supplies into any space along with paper towels if anything still moved. Those scrapbook containers closed perfectly over the egg trays so that they did not move, and this non-movement is key, I think.
Anyway. . . I had three of those scrapbook containers in the end. I packed them in a hardcase suitcase (cheapo one from TJMaxx) with clothes and other things around them.
I **checked** the suitcase through the airline, so I'm certain it got tossed around ![]() I also placed large stickers with "FRAGILE" across each plastic container, in case they saw strange shapes in the xray and needed to open the case.
I also placed large stickers with "FRAGILE" across each plastic container, in case they saw strange shapes in the xray and needed to open the case.
I am so happy I figured this out and that they all made it safely!!
Oh, one more note: the daises you see in the pictures were done AFTER I arrived and were not shipped along with the carnations. I doubt those would have done well because the petals on those are SOOOOOO fragile (I'm not expert, so I think they should be a little thicker to prevent the breakage I'm seeing even just handling them).
Wow!! You have mad skills on carnations. Those are all beautiful. I agree that daisies are hard to work with.
When is/was your brother's wedding? Do you have a pic of the finished cake? What a darling gift of love to make and transport all those flowers.
I'm with MadMillie, I've never seen "large 30 egg plastic trays that snap together". Are those made for camping trips? Are they available at your supermarket? All I've seen is the recycled cardboard egg "crates" made of two pieces of molded cardboard and sealed with plastic wrap.
Thanks. I saw the new pics of the egg containers. We just don't have those on the West Coast apparently. I'm glad you were able to recycle something that worked for you! (I love finding new cake uses for free stuff that we use anyway.)
May I ask where you buy those eggs? Brand? Store?
I've got relatives back east and in the midwest who may be able to save up some for my next visit.
Apti: Sorry I forgot to say, the wedding is Saturday. I am doing my first large batch cupcakes (100+). The flowers are going on as toppers, with the bride and groom cupcakes having a few more than all the rest.
The eggs are sold like this at our local grocer, but I've seen them at places like Sam's, Costco, etc. They're not organic, so I don't really buy them this way for our own personal use ![]() For that, I have a friend who gives me her chickens' farm fresh eggs!
For that, I have a friend who gives me her chickens' farm fresh eggs!
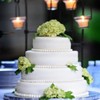
Okay, the photographer just posted the wedding photos--she only published 3, and you cannot really see the details too well. Here they are, along with the display that I put together with whatever my mom had (plus a little help from Michael's, of course ![]() ). . .
). . .


Your carnations look real! Especially the white ones with the little hint of green. Can I ask what cutters/veiners you used for the carnations and the Gerbera daisies? Those daisies look more detailed than the PME daisy cutter. Your brother has a great sister in you!!
Thanks!
dawnybird: I used the PME cutters for both ![]() The daisies were delicate because I think I rolled the GP too thin. Then, I used the flower/leaf tool to thin/texture each petal by hand. I stopped balling them first, because they were already pretty thin
The daisies were delicate because I think I rolled the GP too thin. Then, I used the flower/leaf tool to thin/texture each petal by hand. I stopped balling them first, because they were already pretty thin ![]()
I layered only two of the same size, then placed them on an inverted crystal tumbler, which had nice snowflake-like groves in it that forced the petals to separate from each other nicely as it dried. Here is a picture of the bottom of the glass: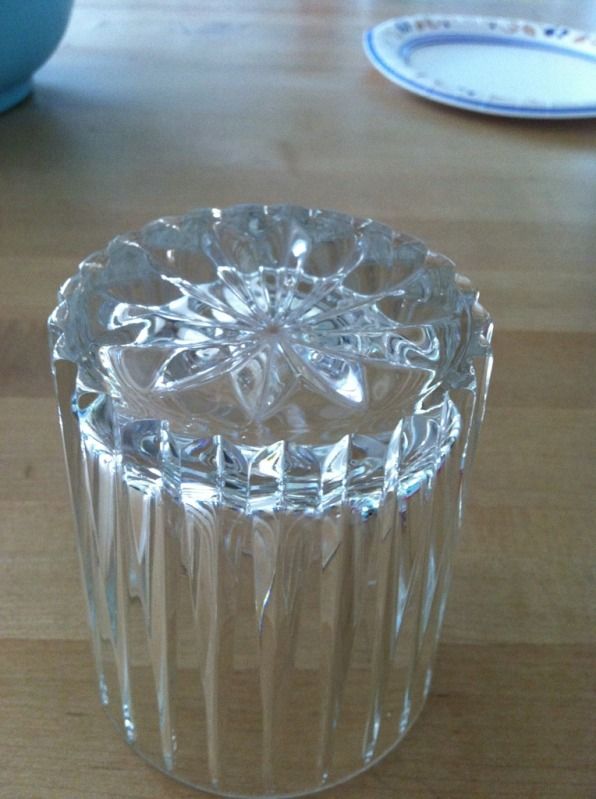
Thanks for the nice comments!
As for the carnations--I used the PME cutters, but it took dozens of trials and errors to get them to look like they did.
I finally got a good method down, and believe it or not, it was using accessories not meant for flower making ![]() I think I posted that elsewhere on the forum--my make shift flower making supplies, when I didn't have the proper stuff. I eventually got the flower foam pads, but after using those for awhile, preferred my makeshift ways
I think I posted that elsewhere on the forum--my make shift flower making supplies, when I didn't have the proper stuff. I eventually got the flower foam pads, but after using those for awhile, preferred my makeshift ways ![]()
I first made little "tear drop" shaped GP pieces for each flower, and let them dry (they looked almost like those candy-coated sunflower seeds). I cut out one circle using the smallest carnation cutter, balled it from the center outward, on my makeshift facial pad-covered-in-plastic-wrap ![]() Placed it on the backside of my hard rubber veiner mat, and used the "bulbulous cone" tool to frill each petal segment. Specifically, I rolled each segment first just to stretch it out, then went back over each a bit more to get the edges to fray.
Placed it on the backside of my hard rubber veiner mat, and used the "bulbulous cone" tool to frill each petal segment. Specifically, I rolled each segment first just to stretch it out, then went back over each a bit more to get the edges to fray.
Then, I lightly moistened the first circle petal and squeezed it around the hardened teardrop shape and placed in my upside down icing tip container--perfectly sized holes for these to set up in, while still allowing the petal tips to remain fluffy!!!
I repeated this with another cutout from the smallest circle and placed that around each of the drying buds. Then I put another two rounds from the medium cutter on each--for a total of 4 cutouts per flower.
I knew these would be set on top of cupcakes, to the base of each flower is not true to the carnation. So, if you plan on showing the undersides, I would follow the stem tutorials on that.
If I knew how to make tutorials, I would share this whole process visually!
Quote by @%username% on %date%
%body%