


How To Ice Cake With Two Different Colours Of Buttercream?
Decorating By Tor1985 Updated 17 May 2010 , 1:15am by Tor1985

Can anyone tell me the best way to ice a cake with two different colours of buttercream?? The sides of the round cake will be pink with a diamond pattern on it. The top will be all white...how do I accomplish this? Is there a video someone can suggest...I googled it but maybe my wording is difficult to understand becasue I didn't find any results.
Also, How do I get the diamond pattern on the side of the cake? I looked in both bulkbarns - the only cake suppliers near me - and they didn't have a mat I could use...any tips?? Or videos?
I let the buttercream crust first then smooth then imprint the diamond shape? ....sigh....learning, learning, learning ![]()
Thanks
Victoria
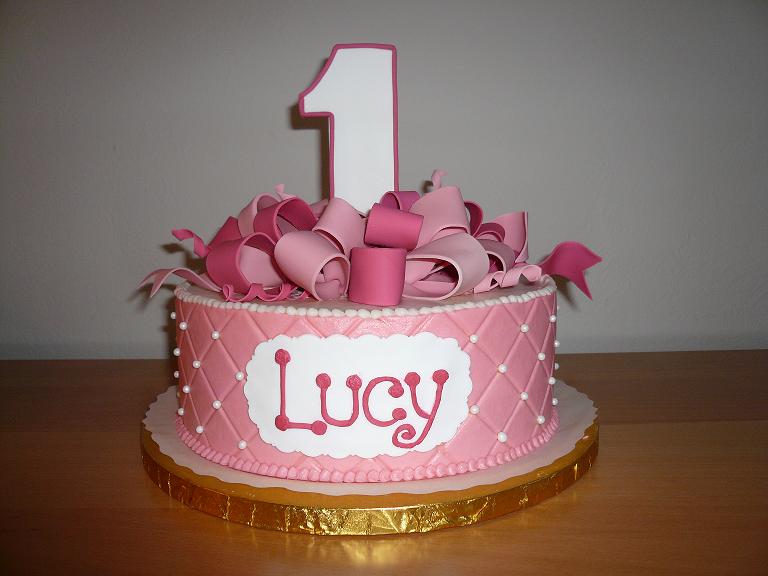
you do realize that cake is covered in fondant and thats how it has that diamond imprint
my bad it is buttercream, just need to wait for it to crust over
look at my pics to see a 2 colored buttercream cake sweet 16 cake
just do you color section first then your white and cover with a border to hide where they meet
gl
You can still do the diamond pattern on fondant. I'm not sure how to do that w/out the mat. Do you have time to order it online?
To get the 2 separate colors. I would do the white on top first, then do the pink. The border between to 2 would cover were the colors meet.
I'm not so sure it is fondant. I think it is buttercream.
Either way, you can certainly do it with a crusting bc. Here's how I would do it:
~Crumbcoat whole cake in white bc.
~Using pink, cover and smooth the sides. Get as close as you can to the top. If you have areas where the pink is higher than the top edge, just smooth it toward the center of the top. You'll be covering it up anyway.
~Ice the top in white and get as close as you can to the edge, being careful not to go over the edge this time.
~Smooth the top, but you don't have to be overly concerned since you'll be covering it with the bow (which I love, BTW).
~By this time the pink should be crusted enough to do the diamonds. Use an impression mat for this.
~Borders. Done.

If you can't find an impression mat (or don't want to spend the $), use a ruler and a knife to make the impression. let the icing crust and gently press the back of the back of the knive into the icing at a diagonal. use the ruler as a straight-line guide, but do not actually press it against the cake.


I saw somewhere (youtube maybe) where the gal was icing the whole cake then froze it until the icing was firm, then flipped the whole thing over and the bottom became the top, which she then iced. I think the video was showing how to get sharp corners on a buttercream cake. (does anyone know what I'm talking about?)
Couldn't you use this method-Ice you cake in pink, freeze it, flip it, wrap wax paper around it at the same height as the cake so you protect the sides while you ice the top in white.
I'll see if I can maybe find the video.
Hope this helps!

I saw somewhere (youtube maybe) where the gal was icing the whole cake than froze it until the icing was firm, then flipped the whole thing over and the bottom became the top, which she then iced. I think the video was showing how to get sharp corners on a buttercream cake. (does anyone know what I'm talking about?)
Couldn't you use this method-Ice you cake in pink, freeze it, flip it, wrap wax paper around it at the same height as the cake so you protect the sides while you ice the top in white.
I'll see if I can maybe find the video.
Hope this helps!
This is how I would have accomplished the task as well with the following exceptions:
I would smear white icing on wax paper in a size that was larger than the cake and freeze it. Then I would take what was going to be the top cake layer, ice the top with additional white icing to act as glue and place that topside (iced side) down on top the frozen white icing.
Next I would continue to build my cake upside down with layers and filling and put everything in the freezer to firm up for about 30 min - 60 min.
I would then ice the sides in pink and take a putty knife to smooth the sides at the same time you are scaping any excess white from what is for the moment the bottom tier. Chill for 30 min or so.
Flip the whole thing over and remove the wax paper from what now is the top. Add your diamond design, add decorative borders and voila.
That's how I would do it!
I just went to Stephanie's Cakes website and she says she frosted the cake in buttercream. It probably is a crusting kind of buttercream.
And she did a little smash cake for the one year old. This is a new term to me. Does this mean you get to actually smash the cake? What a waste, I would rather eat my cake then smash it, but then again I do have a rather large sweet tooth. ![]()

the smash cake is usually just a 4" round single layer cake (not much bigger than a cupcake) and it's meant JUST for the 1 yr. old to "smash" (literally) and then the rest of the party goers eat the main cake!
as for the 2 toned why not ice the whole thing in pink and then use a cake circle the exact size of the top of the cake and make a fbct out of white icing, freeze, then pop it on top of the cake and pipe your border where the 2 colors meet!
Quick and Simple!
Sorry, I can't find the video.
Regymusic, your method sounds like what was in the video, thanks for the refresher! I now recall she did spread the icing on the wax paper with a circle drawn as a guide on a cardboard underneath. Froze it, then put the cake on top and built the cake upside down. That was the bottom while she iced the sides, then froze again and flipped over.
Good luck Tor1985, I hope this works for you!
To get the 2 separate colors. I would do the white on top first, then do the pink. The border between to 2 would cover were the colors meet.
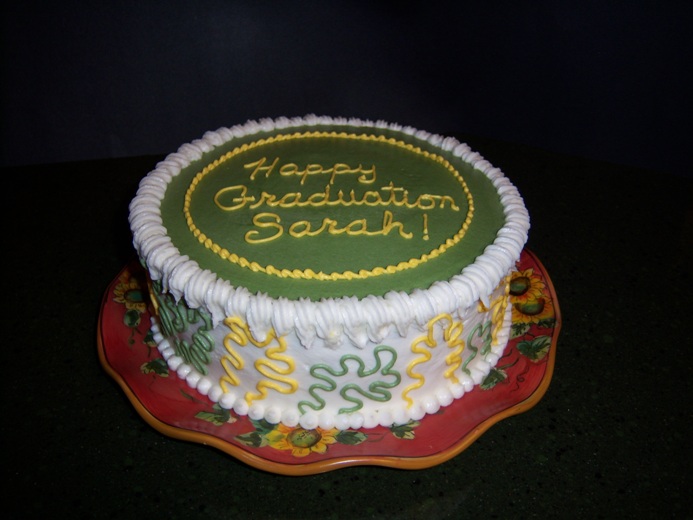
That's exactly how I did this cake -- it's much easier than you'd think!
Just had a thought....what if I made a template for the diamond pattern out of wax paper?? cut the wax paper to fit around the cake, measure and draw all the lines on it then stick it to the cake and use the back of a knive a make the impression....think that would work okay??

When I do 2 colors I do the top first and then I do the sides and smoothe them well. Whathever is extra at the top
corner I take a knife or spatula and take it away. THe border will cover where the 2 colors meet.
The Cake on the photo is definitively buttercream. If you dont have an impression mat you can use a long
skewer to mark the lines. A triangle ruler might help with the measuraments. But be careful with the ruler touching
the buttercream.
Edna ![]()

I did a two-tone cake once without a border at the color change. I iced the whole cake in the side color, then after it had crusted, I piped (with a flat-ish tip) the top color in the shape I wanted on the top (about 1/2" inside the edge of the top). Then, similar to how you might flood a sugar cookie, I carefully spread my top color buttercream within the piped outline. Viola!
I would have never thought of using a skewer stick...and I just bought a whole package to do kabobs on the BBQ this weekend...PERFECT!lol
Thanks for all the help!
Edna, love the videos they are so helpful
I am glad they help!. I never use the skewers for BBQ..lol I buy them for cake stuff!
Edna ![]()
Finally was able to upload my photos
http://cakecentral.com/modules.php?name=gallery&file=displayimage&pid=1676292

This is how I would have accomplished the task as well with the following exceptions:
I would smear white icing on wax paper in a size that was larger than the cake and freeze it. Then I would take what was going to be the top cake layer, ice the top with additional white icing to act as glue and place that topside (iced side) down on top the frozen white icing.
Next I would continue to build my cake upside down with layers and filling and put everything in the freezer to firm up for about 30 min - 60 min.
I would then ice the sides in pink and take a putty knife to smooth the sides at the same time you are scaping any excess white from what is for the moment the bottom tier. Chill for 30 min or so.
Flip the whole thing over and remove the wax paper from what now is the top. Add your diamond design, add decorative borders and voila.
That's how I would do it!
AWESOME!!!! love that techq.!!!! will try for sure!
Quote by @%username% on %date%
%body%