

How To Make A 2 Sided Princess Doll Mold
Decorating By MYOM-Dominic Updated 3 Mar 2010 , 5:20pm by marzipandoll
Hello Everyone,
Some of you may have read a few weeks ago a thread posted by Alexandra (Marzipandoll) asking how to make a mold of a doll in order to create a princess cake. At that time, we were having some problems keeping the thread posted and so Alexandra and I, working via pictures and email, continued with the project in hopes that we could post it later in its entirety. Well, I am happy to say that day has come. Alexandra and I are going to repost this interesting tutorial in a step by step fashion so you all can learn how to make a two piece, 3d mold of any doll in order to create fantastic cakes that incorporate human figures.
So, let me lay a little ground work here so that you are up to speed with how this project started. Alexandra asked me how to make a two sided mold of a doll which she wanted to use on top of a cake she had to make for a customer. I asked her to send me a picture of the doll and to also go to MakeYourOwnMolds.com and read: http://www.makeyourownmolds.com/how-to-make-3D-mold which covers the basic method we were going to use to complete this project.
And now I would like to introduce Alexandra who will post her picture and also make her own comments on the processwhich she performed quite well I would like to add. I firmly believe inside every cake artist is a natural born mold maker. Alexandra and I are going to spend this day recreating a step by step tutorial for you all so that you can benefit from her amazing work.
Feel free to chime in and ask questions, CLASS IS IN SESSION!!
Dominic ![]()
Hi all,
Hey Dominic. I guess I start by saying thank you so much for your help, this was a fun project and not hard at all (or you are just a very good teacher), even though I was scared of it if you remember! ![]() This is my very first REAL mold I've made!
This is my very first REAL mold I've made!
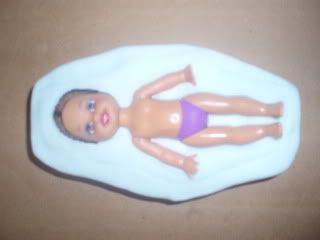
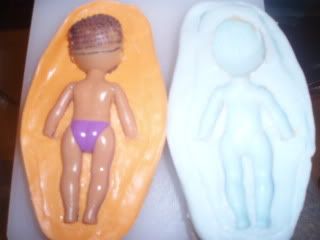
Here is the doll I wanted my little princess to look like, as the Birthday girl was only 4 years old.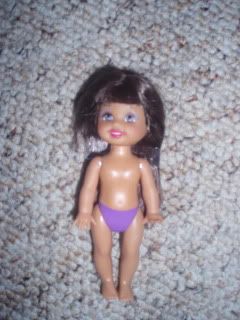
Very good picture Alexandra. Okay so the first thing that we have to do is to establish the parting line on the doll. This line will determine where the mold will come together and also separate. Since the doll was made in a mold you will probably find a seam line running up the sides of the doll. That is the parting line and it would be a good idea to mark it so that it is more noticeable.
Your second step is to give the doll a military hair cut. It is practically impossible to make a mold of hair and if you try you will end up with only disappointment and a big mess.
I gotta admit, at first I was disappointed that the hair needs to go. I was expecting it to come out with the hair and I would just have to paint it. But you know what? It's so much better this way. I will have countless options of hair on the very same doll. Texture, length, color...
Anyway here is the doll with the haircut and the parting line. I used a regular sharpie marker for the line. The haircut was a bit more difficult. I had to cut and shave, and this is how close I got.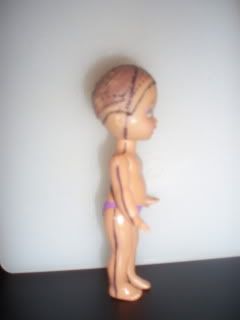
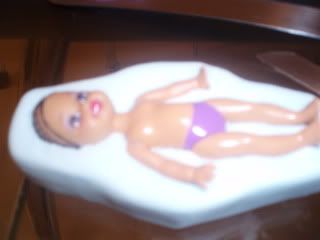
Well Done! Now that we have the dividing line established, we must bury one half of the doll in clay. Because this is a small project, I think you can use fondant as your clay. I doesn't work as well as Safe-D-Clay but you can make a pretty respectable mold using fondant on a small project. First, you want to make a bed of fondant that is thick enough so that you can push the doll half way down into it and the bottom of the doll will not come in contact with your work surface. This bed should be about an inch wider than your doll all the way around. When you have the bed made, push the doll, back side down, into the fondant just to the dividing line. When you are done you should have one half of the doll protruding out of a bed of fondant and the other half submerged in the fondant. The sides of the bed of fondant surrounding the doll are called flanges and this flange should be level with the dividing line of the doll.
I want to add, it doesn't show on the pic I've posted the line goes all around the doll, even on her torso and the inside of her arms, legs. So when I pushed her into the fondant bed I knew how far to push everywhere. The line did help because the head is big all around and I needed to push deeper.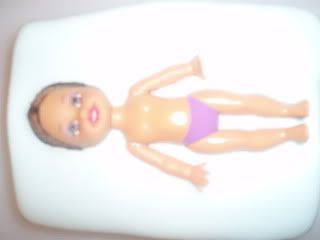
I want to add, it doesn't show on the pic I've posted the line goes all around the doll, even on her torso and the inside of her arms, legs. So when I pushed her into the fondant bed I knew how far to push everywhere. The line did help because the head is big all around and I needed to push deeper.
Your clay bed looks terrific. Now we have to make a side wall that will surround your entire project and serve to hold the CopyFlex Liquid Silicone while it cures around the top half of your doll. To do this, I want you to roll out some fondant about 1/4 inch thick. Cut a ribbon that when laid on its edge will exceed the height of your doll project by about an inch. Attach the ribbon around the clay bed and make sure it is tight so that no fondant will seep through the seam where it comes in contact with the fondant bed.
Once this is done you must paint release dit on the fondant flange around the doll and also on the inside of the fondant wall you just built. If you don't the fondant can possibly stick to the silicone.
ok... i am gonna patiently wait for the rest. been interested since it was first posted.. been playing around with dominic's mold products a little..
Yepp I remember you, and I was going to PM you at the end, but I see you are looking out! 
I measured and cut out the strip...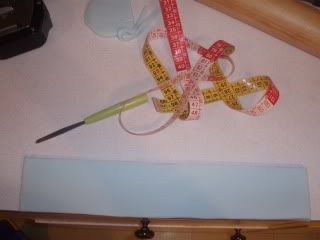
Then brushed the sides of the fondant bed with water, and stuck the wall around it.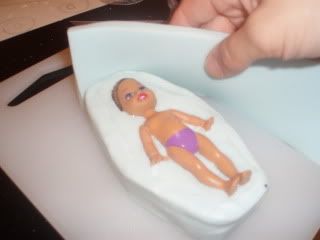
Pressed it on all around tight, and worked the edges smooth, so there are no openings and gaps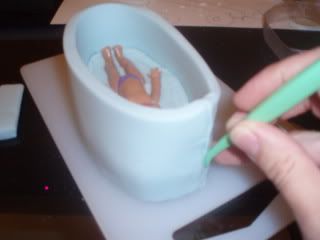
Brushed the surface of the fondant bed around the doll, and the inside of the wall with the release dit. It's like grease, and easy to brush it on. I used a smaller brush to go to small places like corners, under arms, between legs, sides of neck...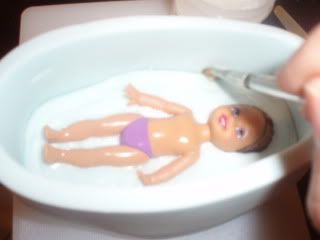
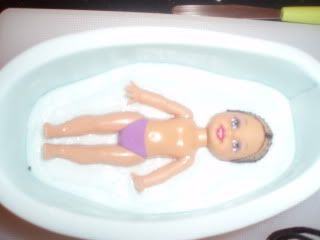
I put the doll in bed! ![]()
Alexandra you are amazing. I swear you are a natural born mold maker.
Your mold box looks perfect. I think it is time for you to pour the first half of your mold. I am not going to go into every detail about mixing CopyFlex because you can learn all that easily at: http://www.makeyourownmolds.com/copy-flex
What I do want to tell you is that you want to pour the CopyFlex so that you cover the doll by about 1/4 of an inch. If you do not have enough, you can always mix up some more and add it.
Secondly, it is always a good idea to paint a skim coat of CopyFlex on the object to insure that no air is trapped in the details and then pour your CopyFlex on top. Your doll is not very detailed so you can just pour the CopyFlex if you want to.
And third, weigh out the two parts of CopyFlex in a container and mix. Transfer the contents from this first container into an second container and mix again. This insures that you have mixed parts A and B together real well.
Thank you. ![]()
I must say this. You told me to use disposable cups to mix. I didn't have any so I used my regular bowls. Hmmm! Do use the disposable ones, you will hate to remove the silicon from your kitchen ware.
I put a mark on the inner side of the wall as a guide, how high is the mold going to come up..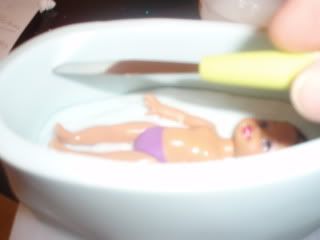
Mixin'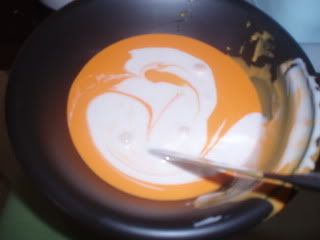
Pouring.
In one corner and just let it overflow the doll.
Tiny bubbles did appear even though I was pouring slowly and didn't move around my flow, but they popped quick.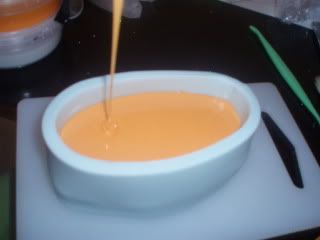
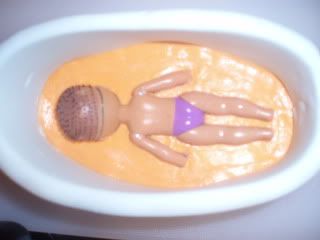
This is what it looked like when I left it to cure.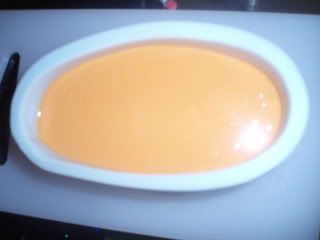
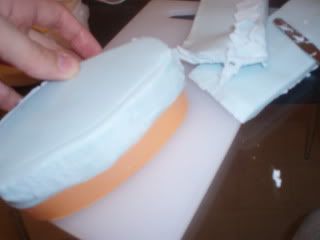
Okay - so its all downhill from here. Once the Copyflex is cured (about 4 - 5 hours) remove the fondant side wall. Then turn your whole project over so that the fondant bed is facing up and the silicone side is down on your work surface. Carefully remove the fondant from the back side of the doll. It is important to stress here that you do not want to remove the silicone from the doll yet. Keeping the silicone on the doll will enable you to make the second half with hardly any seam line.
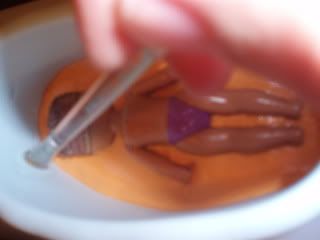
Now that you have the back side of the doll facing upward, it should appear to be protruding out of an orange bed of silicone. You must paint a thin coat of Release-Dit on the top of the silicone so that your second silicone pour does not bond to the first.
Once this is done, apply another fondant wall around the silicone bed just like you did before with the fondant bed. Make sure it is well attached and the seam is closed and tight.
Mix up more CopyFlex and pour again filling to about 1/4 above the highest part of the doll.
Alexandra - thank you for including the tip about marking the inside of the fondant wall. I forgot to add this important detail. The mark will help to establish when you can stop filling the mold box and assures that you have enough poured over the top of the doll to make a strong mold that isn't too thin.
Here it goes, it came apart really smooth.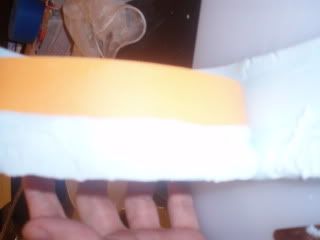
Then I mixed and poured again same as above, and let it cure.
At this point, all you have to do is allow the silicone to cure once again. You might think the 2nd pour of CopyFlex may have bonded to the 1st. pour, but you will see that the Release-Dit is very effective at keeping these two silicone sides from bonding together. Its a good thing too otherwise you might end up with an expensive, rubber paper weight. ![]()
Alexandra - I turn this thread over to you. In addition to showing your completed mold, please share pictures of the cake that you made with it. It turned out terrific!
I would also like to thank you for taking all the pictures and sharing your experience in my forum. As your teacher trust me when I say you are a natural at mold making and I encourage you to continue using that skill to help in creating cakes that will fascinate and amaze your customers, friends and family.
Dominic ![]()
hello..... its me again. ... marzipandoll.. you did great.. i,m taking all kinds of notes. . i do this anytime i see dominic teaching anything on here. i take his demos at convention.. got all his stuff.. but just started playing with it this year. i think i see this little doll at michaels also. gonna buy my one this week.. ha! then i will teach my 2 cake friends what you just did.. they will think i am so smart. .ha! just kidding... you did a great job showing how you did this project. i thank you too.. i just want to learn so much with this. good luck on all your projects too... thanks again
Dominic, thank you so much for taking the time and give me this awesome tutorial, I had so much fun with it. I would love to learn from you more in the future, you gotta let me know when you are doing some classes in the NY area!
The great thing about this mold, it will allow me to make all different kind of little people. Because she is bald and naked I can make her hair many different ways and dress her any way I want, I can change her skin color and facial features as well. So let me show you how the mold ended up and how the princess turned out!
Oh and icer thanks very much for your comment too!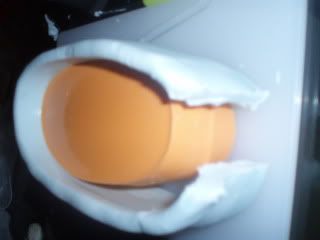
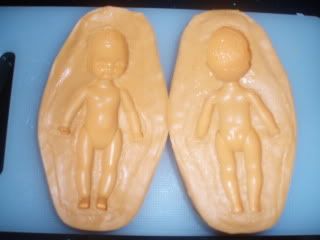
So this is the mold...
I washed my new mold in warm soapy water, and dried it.
The princess...
I colored the fondant skin tone, and put a little Tylose powder in it so it holds up nice. I stuffed my mold and pressed it down as hard as I could. Remember this is a very durable, flexible mold so you can get a little more aggressive with it. I stuck it in the freezer for about 15-20 min, and when I took it out, the mold just fell off my doll. There was a little edge I just cut it off with small scissors.
I gave it a little time to come back to room temp, and I was gonna cut her legs off to reattach in sitting position, but it was still flexible so I could just bend those legs and set her down. On this pic I gave her a little white top too so she doesn't sit there naked.
Notice how the facial features are very light so you can give her different expressions.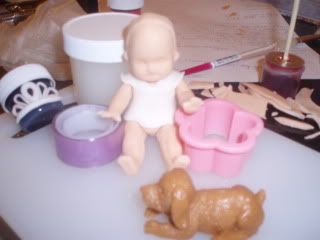
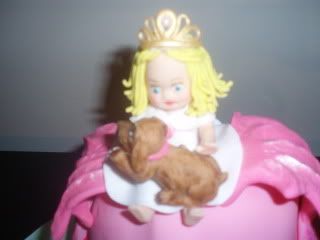
After that I painted her face, used a little fondant for the eyes, used a garlic mincer for the hair, because I didn't have my clay gun at the time...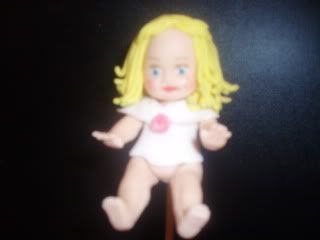
Made a tiny tiara and painted it gold.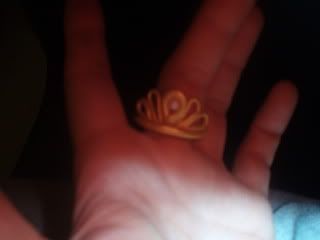
Made her a baby dragon, only a hatchling as I was asked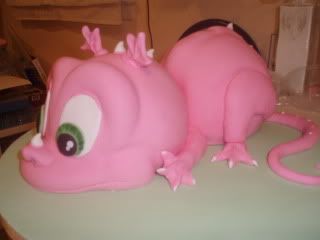
Set her between the wings..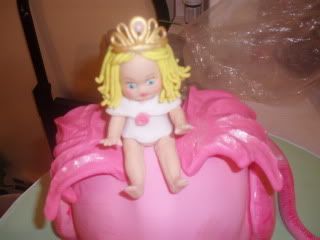
Then finished dressing her, and gave her her little brown puppy.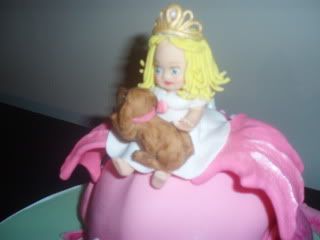
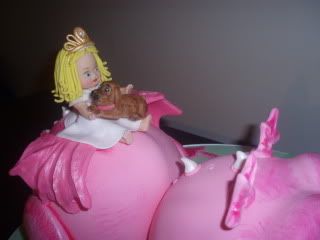
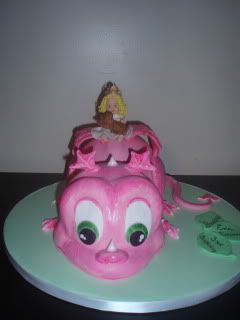
The ready cake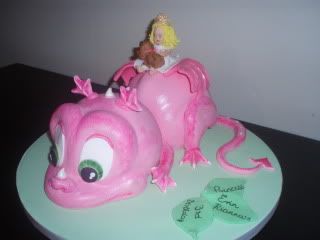
Again, Dominic thank you so much! I have to make another figurine with this mold in the very near future, and I get to try it with different skin tone and hair, so I am looking forward to it, I will show you that too!
Thanks all for looking!
marzipandoll... you did GREAT... love your cake.. love your princess. can,t wait to try it..our last little mold party was at my friends home.. this time it will be at mine. we will at least make the first half.. then they will know how to finish it.. i am excited...i love making hair with the garlic press. her hair looks great ..
Thank you!!! A mold party sounds cool! I have no friends with caking interest near by. ![]() But when you do it, I'd love to see pics of yours too! GL!
But when you do it, I'd love to see pics of yours too! GL!


wow! i enjoyed reading this! thankyou both for taking the time to do the tutorial!. jade-your cake looks too adorable! love it!
wow! i enjoyed reading this! thankyou both for taking the time to do the tutorial!. jade-your cake looks too adorable! love it!
Oh hi lady! Where have you been? Thank you very much I am glad you enjoyed!

this is the most amazing tutorial ive seen in a long time! wow!! thank-you so much for posting the instructions.
your princess and cake (and puppy too!) are amazing! outstanding work- probably because you had an outstanding teacher!!
great job and congrats to both of you-
Very glad you liked the tutorial. This is exactly the type of information I hoped I would be able to create here on Cake Central.
Dominic ![]()


Oh my goodness! I just got to read all the way through the tutorial and must say that you two did an awesome job showing us exactlly how you did your little girl mold. It was very insightful and down to the littlest detail.
Thank so much and cant wait to show my sister this. She got me into cake decorating and i love it. this will be one thing i get to teach her now thanks tp you ladies. I will be looking for other tutorials from you 2 all the time.
Thanks again and great work. Cake looks lovely!
Quote by @%username% on %date%
%body%