


Bought the book a few months ago, love the recipes and ideas in the book. Definitely worth the money. Being new to cake decorating, I refer to it all the time. Anyway, here's the directions, somewhat lengthy.
1. Cut the shape of a hat brim out of lightweight cardboard (cake box). Template measures: 6 1/4" length x 4 3/4" wide. Shape the cardboard into a curved form place it on empty paper towel roll to hold shape.
2. Dye 10oz gumpaste navy blue. Roll out 8oz, 1/8" thick to fit over template. Trim away excess gum paste where the brim joins the hat.
3. Place on template, using a stitching tool, make 6 lines, 1/4" apart along the edge of the brim. (Easier to have an actually cap for reference). Let dry for 2 days.
4. Roll out green fondant to 1/8" thick and cover cake base.
Assembly:
1. (Directions say to bake 3-9" cake pans. After sculpting I had only needed 2 cakes, took that much off!)
2. Make frosting
3. Place on round cardboard, stack and fill layers. Freeze for 1 hr.
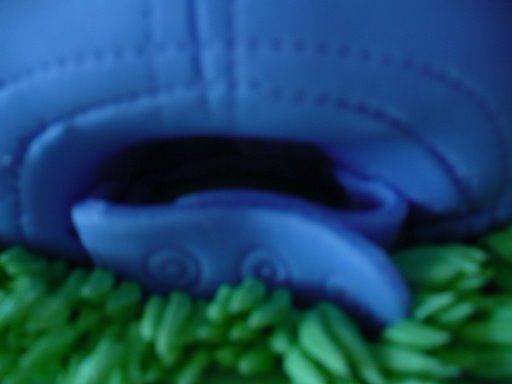
4. Sculpt cake to look like an upside-down bowl (I thought it was a little more oval shaped than a bowl). For extra detail, carve a hole, approx 2 1/4" wide, 1 1/2" high, 2" deep, in the back for the adjustable strap. cut away any cardboard showing.
5. To add dimension, cut away a few slivers near the top of hat. When covered with fondant it will look like dents in the fabric. The carved cake should be approx. 7 1/4" front to back, 3 3/4" tall. Crumb coat cake.
6. Dye 1 1/2# fondant navy blue (match the gum paste). Roll 1/4" thick, place on cake. Make sure to apply fondant to back of cake where the head strap will go and trim bottom edge carefully.
7. Attach cake to base. Remember to leave room for the brim.
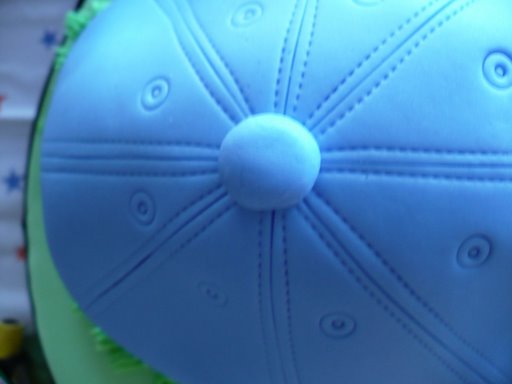
8. using paring knife or scalpel, score hat into 8 sections, don't cut all the way through. Start front to back, side to side, 2 diagonal lines that crisscross in the middle. Then on both sides on the line, use stitching tool to make stitching marks.
9. To make the rivots on the top of the hat use #802 tip to create holes then use tip #3 to make smaller holes inside the first hole.
10. Roll out marble sized ball of gum paste for buttom on top on hat. Use water to attach.
11. Roll out navy gum paste 1/16" thick to form head strap. Cut strip 4 1/2" long and 3/4" wide. Divide strip into 2 pieces: 2" and 2 1/2" long. Round end of 2" piece and place rounded end on top of other piece, attach with a dab of water. Using tips again, make rivots on strap. Using water, attach ends of strap to inside of the hole in the back of hat. Use stitching tool to go along the outside of the hole.
13. Roll extra navy fondant into a ball and place in center front of hat on cake base. Will act as support for the brim. (Didn't do this, not necessary).
14. Release brim from cardboard, attach to hat with water, pressing the brim gently into the hat. Create stitched line where brim meets hat to look like seam. (I had to cut a opening in the fondant to slide brim into the hat, then stitched a seam line into the fondant, over the brim.)
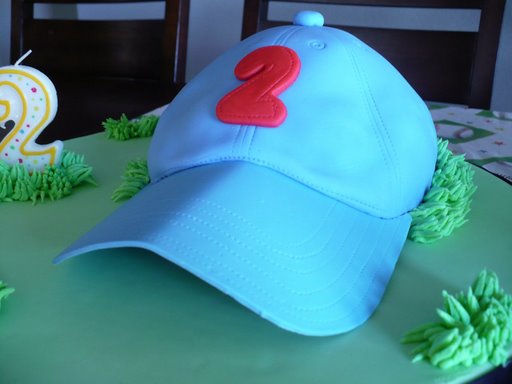
15. She used a yellow star symbol and created stitch marks on the edge of the star. ( I used a #2 cookie cutter, sons 2nd birthday).
16. Attach ribbon to cake base.
Don't mind my amateur version of this cake, I thought pics would be a little easier to understand. I regreted the grass around the hat, it looks like hair!
Let me know if I need to clarify anything. Have fun and Enjoy!
By the way, remarks in () are my tidbits, not from the book

Hey,
I make a smaller 6" version of a baseball hat cake using one half of the Wilton Ball pan set and a 3" tall 6" cake. This is going to sound horrible, but I actually bought a plain hat, covered the brim in cling wrap, then lay the gumpaste brim on top to dry. It is the perfect size!
I have no idea if that helps at all. Just my 2 cents!
=0)
Breanna
I did make a few baseball hats a couple years ago for Father's Day that were much easier. I also used half of the Wilton ball cake pan and cut a half moon out of a 6" cake pan for the brim. Stuck them together and put fondant over the entire cake and then added the details. They were much smaller. I do prefer the look of this hat though, that could also be because I've gotten a little better too!

I made a baseball hat cake for a groom a few weeks ago. I found it easier to mold the cake from (2) 9" round stacked cakes instead of using a ball shaped pan. I think the cake turned out quite nice. I'm having trouble uploading photos for some reason, but please check out the photos on my blog. http://dotscakestudio.blogspot.com/2009/06/boston-red-sox-hat-cake-for-groom.html
The rim needs to be made days in advance to completely dry. If you rush this detail, your brim will sag (like I've seen on most hat cakes).
I'm attempting this cake for my brother this weekend, it will be my FIRST fondant/gumpaste cake....I'm a little confused on the difference between gumpaste/fondant, could I use fondant to create the brim? or wouldn't that harden enough to hold the shape?...like I said I'm new to fondant so any help would be great! Thanks! Beth
My future Sister N Law wants me to make this cake for her wedding in October. Thank you so much for this post I will be trying it soon so I can perfect it by October. His baseball cap will be a Cubs hat though again Thanks so much. I will let you know how things turn out ;0)

I want to try to do one of these! Thanks for the instructions!

Those are lovely pix of the baseball hat cake! ![]()

That cap is amazing. Saving this thread for when I make DH's birthday cake next week ![]()
WOW! I love these cakes! Hope mines turns out just as good!
I just made a baseball-cap cake this evening for my husband's birthday tomorrow. I followed the directions from Confetti Cakes somewhat closely, and came out with something that I am really really pleased with! I used my husband's favorite cap, from his pre-college days as a pizza-delivery guy, as my 'model'.
I spent four hours on this cake today - the time went by really quickly, because I was having a total blast! I baked the cake yesterday (Dec 18th), from the chocolate cake recipe provided in Elisa Strauss's book (Confetti Cakes). I wrapped the cooled cake up in Saran wrap and put it into the fridge to chill overnight - it's a chocolate fudge cake; totally delicious, and most importantly, it has a really dense crumb and can withstand all the carving.
This is roughly how I did it:
This morning I made a batch of Swiss meringue buttercream to use for icing the cake (later). This afternoon, I put all my tools and equipment together and got to work on the real project - carving and sculpting this block of cake into a baseball cap. I had baked the cake batter in three pans (an 8-inch pan, a 7-inch pan, and a 6-inch pan), so when I stacked them all on top of each other, they were already somewhat 'curved' and I created far fewer cake scraps when carving the sides away into a broad oval-shape. I carved with a really sharp bread knife mostly, and a little paring knife for the details, working carefully to create those 'dents' along the top of the cap that are supposed to look like crumples in the fabric. Then I cut away the bits of cake-board that were still sticking out, and crumb-coated the cake with my Swiss meringue buttercream. The whole thing was chilled for ten minutes while I dyed the fondant denim blue (using blue, brown and black gel food coloring). I used maybe 1-1/2 pounds of fondant total, for the hat brim AND the cap itself. (By the way, I did not make the hat brim out of gumpaste, as Elisa recommends - I made it out of fondant, since I didn't want to bother trying to match the fondant and the gumpaste when dying them separately.) I rolled the fondant out; didn't use spacers, just eye-balled to get it to approx 1/4-inch thick. Then I covered the cake with it and moulded everything carefully by hand, smoothing the fondant into the 'dents' on the cake and paying particular attention to the deep indent at the back where the headstrap would go. Trimmed extra fondant away with a paring knife and lifted the whole cake up off the counter so I could go all around the bottom edge with my fingers, smoothing and tucking the fondant in so it'd look more natural.
I used my stitching wheel for the stitching effect, dividing the cap up into six sections (Confetti Cakes says eight sections, but my husband's cap has a slightly different design). I used my piping tips (#12 and #3) to create those little rivets along the top. I used some extra fondant to make the head strap and the brim (I used my husband's actual cap as a template - took a bit of parchment paper, held it along the brim of his cap and cut around it with scissors to make a template, then cut the fondant with an X-acto knife according to the parchment template). I 'glued' the brim onto the body of the cake with water only, carefully pressing it into place. I initially used a slightly-squished empty toilet roll underneath the brim, once attached, to help give it that natural curve. I used the stitching tool along the join to make it look like it was sewn on. The toilet roll wasn't giving it quite the right shape, so I propped the whole brim up with a shaped piece of cardboard, propped up with some pieces of bunched-up kitchen towel. Finally, I diluted some gel food coloring with vanilla extract (ran out of lemon extract!) and used a soft brush to paint the entire cake to make it darker and more denim-textured. I used a tiny brush and some diluted black food coloring gel on some of the details, like the rivets, to bring them out and make them match my husband's actual cap. I made an oval plaque out of sugarpaste and painted it burgundy and green with a tiny brush and some gel food color to make it look like the "Pagliacci" pizza logo, and glued it to the front of the cap with water. Used the stitching wheel on that, too. Then, it was done! I am so incredibly THRILLED with this cake! I think he is going to be astonished and delighted with it. I love that everything about it is completely edible (except the cake card, of course!).
This is the first sculpted cake I've ever made. I'm happy to help other newbies with their baseball-cap cake projects, in whatever way I can.
Cake-carving begins (note deep indentation for where the headstrap goes):
Cap covered in fondant:
Stitching details and rivets added:
Finished cap (side view):
Finished cap (from above):
Finished cap (front view), with logo:

I've been looking at this cake for a while now, and never made it because of the carving involved. Afraid of messing it up after all the baking, etc. all the work for nothing. But yours turned out fantastic, and you too have not carved a cake before. So one day I will try. Thanks for pics.
Thanks, everyone!
@ crumbcake: let me know when you've given it a try. I was a little nervous too, and not convinced that I would succeed with this. But the instructions in Confetti Cakes were pretty thorough, plus I figured it was for my husband (and not a paying customer) so it wouldn't matter TOO much if it wasn't 'perfect'. Besides, perfection is kinda unnecessary with a cap-cake... the fabric is supposed to look wrinkled and crumply anyway, so that makes my inexperience with fondant less significant. ![]() Good luck!
Good luck!
Oh, I am posting a couple new pics of the cake now that the extract has dried and it doesn't look so shiny any more. Also, we finally cut into it (broke my heart - but it was yummy!) so I figure it's worth showing a pic of the insides. 


@jlobannon,
I would find an image of the logo online, print it out onto cardstock, cut it out, and use it as a template. Then you can roll out a sheet of gumpaste (or fondant with tylose added) in the appropriate color and use an Xacto knife or scalpel to cut around your NY Yankees template. Let it dry a little to give it stability before you apply it to the cake - that way you avoid stretching or morphing your logo as you pick it up and handle it.


I have a baseball wedding shower this week! The MOB wants a cake for 50 and gave me the invitation because they want the cake to match! Well thank goodness for this thread ya'll cause I was stressing this one big time!
I am going to do a 12" base and add details to it then top it with the hat! I think with the 12" serving roughly 44 and the hat they should get more than 50 servings!
THANK you all for your tips and the photos and DETAILED intstructions! I LOVE CC!
Quote by @%username% on %date%
%body%