


I am VERY new at chocolate making and have bought 5 new 3d molds. I have no idea how to use them. I've tried researching on the web. Do I have to cut the molds and clip to together? Can I just pour the chocolate, dump out the excess before it hardens and after popping the pieces out, assemble them?
The molds I have are tea sets (cup, saucer, teapot), cowboy boot and rubber duck.
Help! ![]()

Essentially it's how you just said it. You pour the chocolate in the mold, then turn it upside down and let extra drain out (reuse that) then freeze for a few minutes, pop out and use. Unless these are some fancy molds that I am not familiar with, that is. I have no idea what you mean by cut them out and clip together. Not sure what that would be. Sorry!
Edited to add: If you are filling the mold with candy centers, do it while they are still in the mold. Don't pop them out and then fill them! Can you say 'breakage'! Hahaha!
I am VERY new at chocolate making and have bought 5 new 3d molds. I have no idea how to use them. I've tried researching on the web. Do I have to cut the molds and clip to together? Can I just pour the chocolate, dump out the excess before it hardens and after popping the pieces out, assemble them?
The molds I have are tea sets (cup, saucer, teapot), cowboy boot and rubber duck.
Help!
Here's some instructions
http://www.onestopcandle.com/chocolate/appleproj.php
cheers
Nati
I had read somewhere that you have to cut the mold, about 1/4" to 1/2" around the outside. Then you have to put special clips around them to hold them together....similar to the 3d bear cake mold by Wilton.
If I cut my molds, there is not much room for the clips! My molds also have these indentations that appear to "align" the molds properly if they were put together. Ever seen that before? ![]()
nope, I hadn't heard of that. Sorry. I was assuming you were speaking of the plastic molds that you find all over the place that you just pour the chocolate into. If you've got a multi cavity type plastic mold, then you just do it like already explained. Without seeing the mold I couldn't tell you otherwise.

Yes some molds need to be cut. I have some molds that have a dimple that matches a nub. This shows where the mold will go together. I pour chocolate into both sides. I then flip one onto another. I clip them together with Binder clips-Black and metal ones. I adjust the mold so that all parts match up. Tip back and forth and upside down for what seems like forever! I will lay it on the counter and flip very couple of minutes. If you do not coat the inside it will be thinner in some parts. I will put in the frezzer to set. If it is a standing object you will want to stand it upright so it is heavy on the bottom--Chocolate will collect at bottom. Hope this helps!
PS I alos will tap it on the counter to remove air bubbles!
Where can I get those binder clips? For my teapot, how would I pour the mold and have the opening on top for the lid (which has its own mold)? I don't want to cut any molds unless I absolutely have to. ![]()
By the way Melvira, I tried your foam roller method on my cake. It works great! My kids thought I went nutty though ![]()
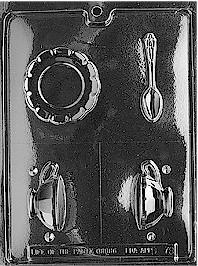
Here is the mold I have
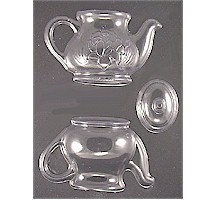
I have a tea pot mold. It has a lid that needs to be glued on after. Go to my website if you get a chance www.cakesbymaryann.com
I used it in my other competition gallery on a tea pot cake. I actually pressed sugar in that one but it sounds like the same mold.
You can pour it in pieces bit you will have a more noticable seam. You can get the clips at any office store!
Quote by @%username% on %date%
%body%