


Puppy Cake Tutorial, Part 1. With Pic's
Decorating By justfrosting Updated 26 May 2013 , 2:24am by smittyditty

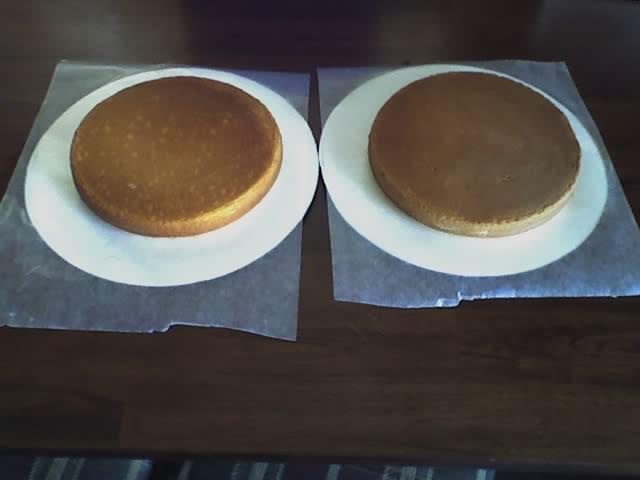
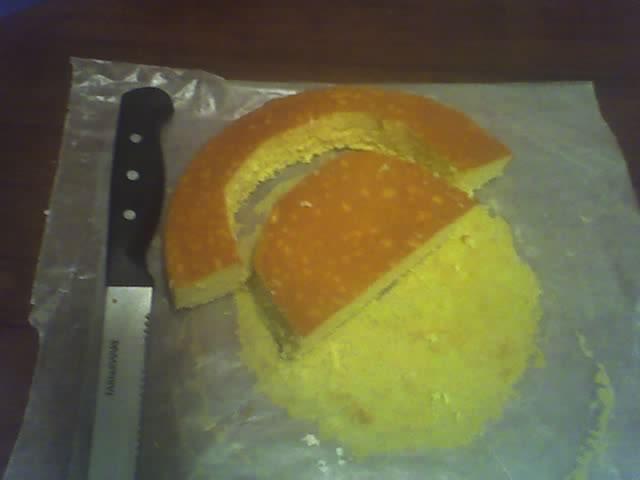
2 9 inch cakes.
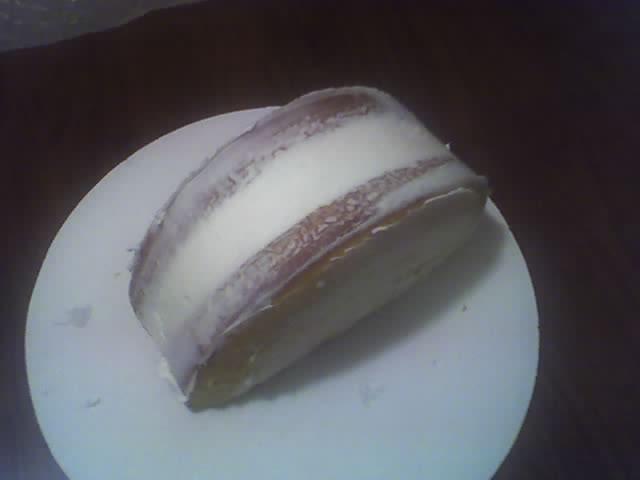
1. The first cake you cut in half and ice them together in a half moon shape. This is the body. You place it on your cake board, hump side up Crumb coat.
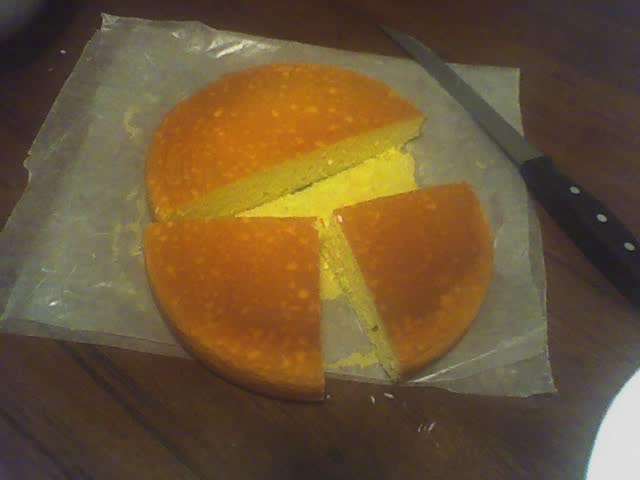
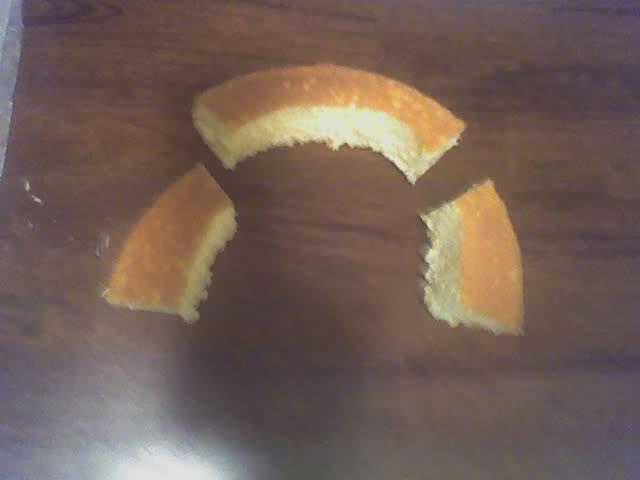
2. The second cake you cut in half as well. With one half, cut it into two quarters, these are the back legs.
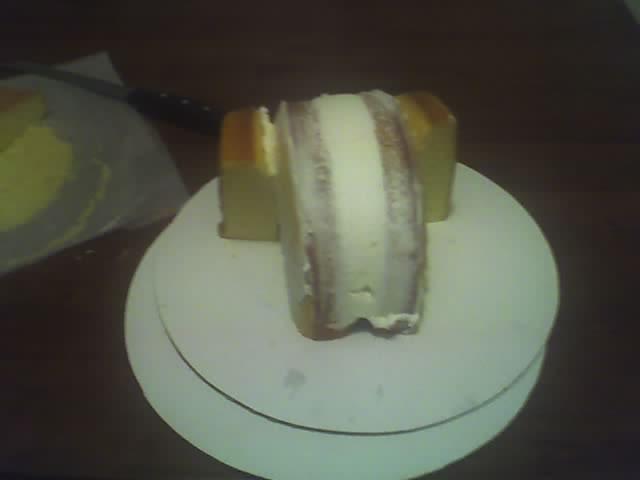
3. The other half is the only tricky part. Cut a small half moon shape, this is the face. Place it flat against the body.
4. With the rest of the cake scrapes (it should be kind of a rainbow shape) cut four squares. One is the tail. One is the nose. Two are to make the ears... Most of this cake is shaped by the icing
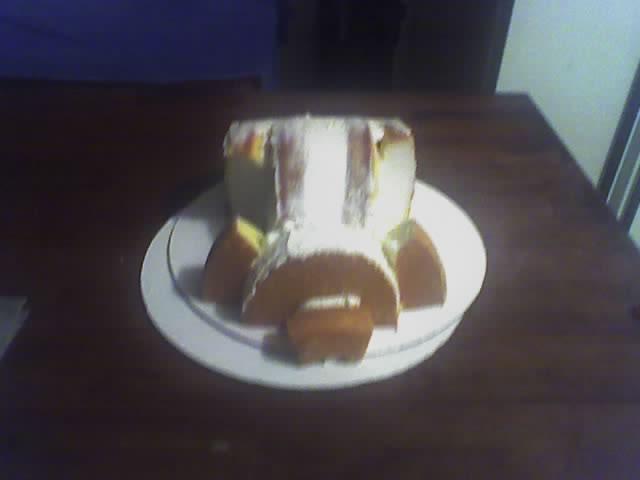
5.Glue everything together with icing. Crumb coat and let sit in the refrigerator for a bit.
6. To decorate. Get your grass tip. Begin at the back and bottom and work your way forward and up making fur. (I will post these pic's later today)
I have used toothpick to keep everything together, but you don't have to. I use tootsie rolls died black for the eyes and nose and a pink laffy taffy for the tongue.
Hope this helps.


that helped so much seeing the pic thanks


So very cute!!!! You should think about submitting it to the articles section ![]()


Well, It took forever because I kept waiting for a reason to make this cake--and then I thought "Cake Does not Need a Reason!"
Sorry the pics are so dark--taken with my camera phone. I am waiting for my frosting to soften and I will finish the decorating pictures.
Thanks to everyone who PM'd me and kept the fire lit under my hiney!
I couldn't figure out how to submit it to Jackie. Maybe she will see it here.


Thank you so much for doing this for CC'rs. Can't wait to try this!

Isn't it amazing how something can seem so hard, and when it's explained well, and broken down for you, your like, "Wow, I can do that!!" ![]()
Thanks,
Christie

2 9 inch cakes.
1. The first cake you cut in half and ice them together in a half moon shape. This is the body. You place it on your cake board, hump side up Crumb coat.
2. The second cake you cut in half as well. With one half, cut it into two quarters, these are the back legs.
3. The other half is the only tricky part. Cut a small half moon shape, this is the face. Place it flat against the body.
4. With the rest of the cake scrapes (it should be kind of a rainbow shape) cut four squares. One is the tail. One is the nose. Two are to make the ears... Most of this cake is shaped by the icing
5.Glue everything together with icing. Crumb coat and let sit in the refrigerator for a bit.
6. To decorate. Get your grass tip. Begin at the back and bottom and work your way forward and up making fur. (I will post these pic's later today)
I have used toothpick to keep everything together, but you don't have to. I use tootsie rolls died black for the eyes and nose and a pink laffy taffy for the tongue.
Hope this helps.
![]()
![]()
![]()
why i can't see the pictures in the messages anymore? ![]()
i only see the square and the letters of the picture uploaded can somebody help please! im begging!.... like a dog.... ![]()

I can still see the pics. Maybe refresh your page? Let me know if you can't see them, I can always email them to you.


Thanks for taking the time to do that, justfrosting. It's very much appreciated!

How much frosting...well, I do it with one batch of VIVA BC. It ends of being A LOT of frosting. Crumb coating well will help, because it will cover any holes that may show through.
You have to reallllly like frosting because this cake has a lot of it.
Another note, I have only needed to support this cake once out of the 6 times I have attempted it. I woke up one morning and the ear had fallen off, I reattached with a toothpick.
Also, the toes are piped before you cover with fur.
Quote by @%username% on %date%
%body%