


Instructions For My 3D Carved Lightning Mcqueen Cake
Decorating By Melnick Updated 18 Sep 2011 , 5:51pm by Kathy99

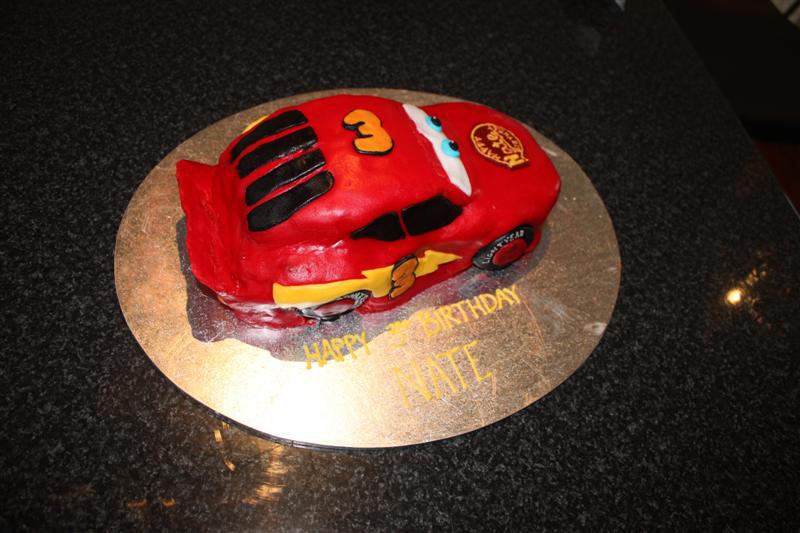
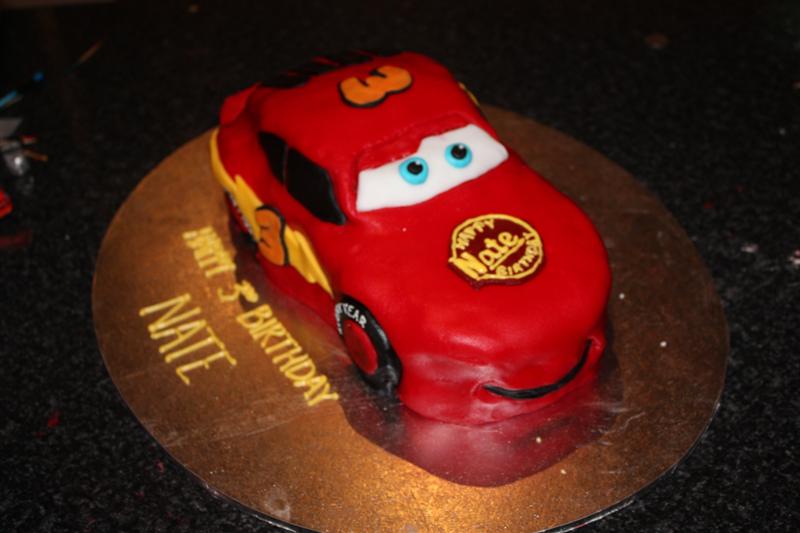
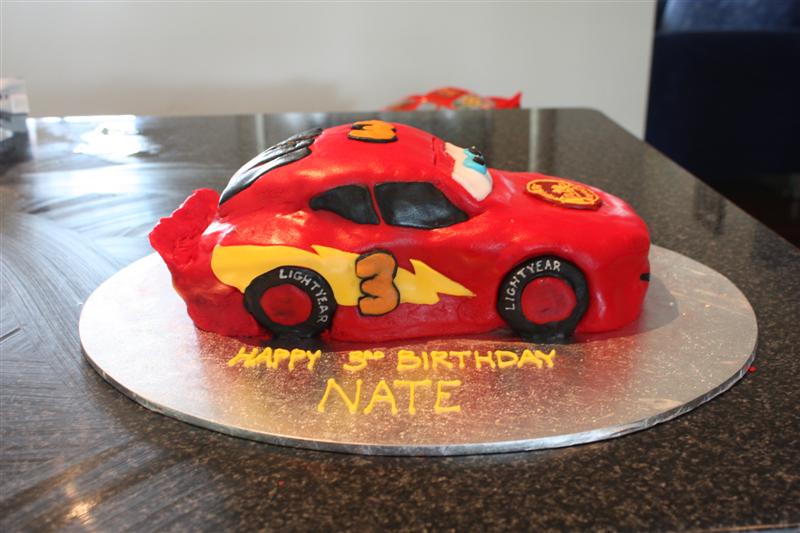
Ok, so I know the finished product isn't perfect but I found it hard to find the instructions that I needed so here are my instructions for a Lightning McQueen cake - I did start with Nati's instructions (thanks so much for a starting point Nati!). These instructions are probably more beneficial to the hobby baker like me who just wants to make the cake for their son!
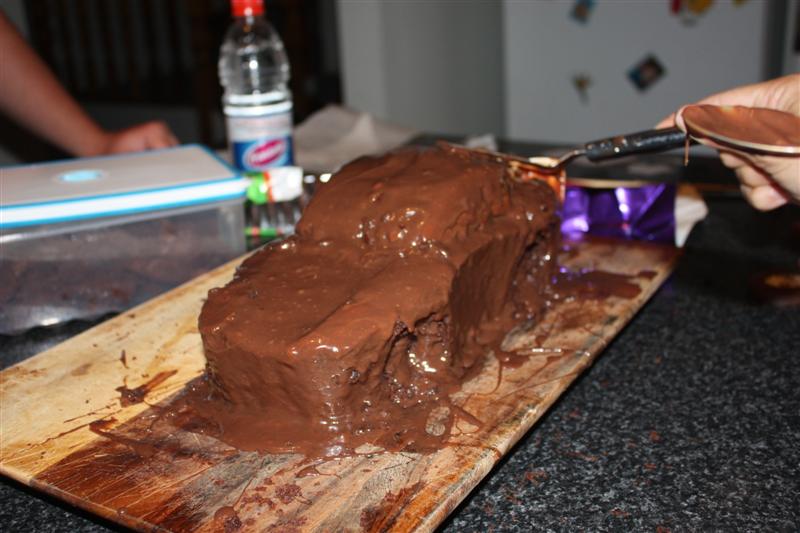
I cooked my cake in a 12.5 inch oval pan. I used a 2 layer cake quantity. In hindsight, I wish I'd doubled it - 4 layer cake quantity - but I'm relatively new to this and really had no idea how much batter would fill the pan. Using the 2 layer quantity is probably just enough but didn't quite allow me to get the shape right at the back. I had to stack the side pieces on top. If I'd used double the quantity, I could have entirely carved the cake out of one piece. I also used a chocolate mudcake recipe.
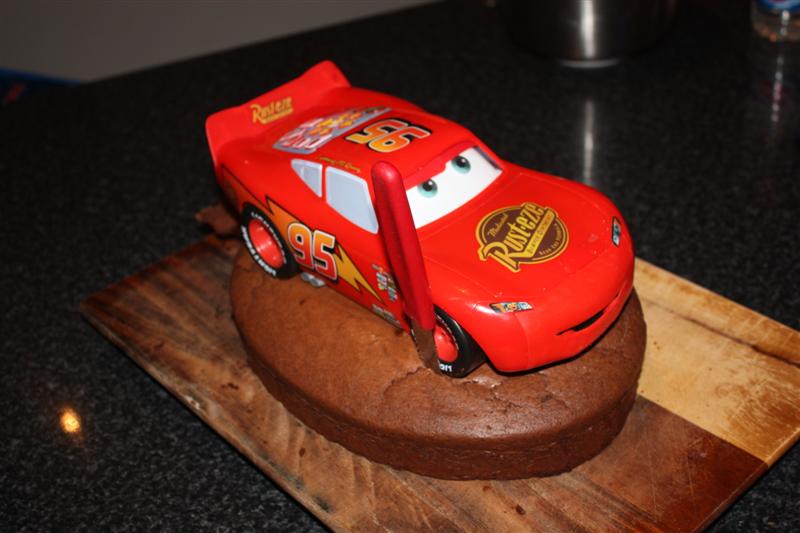
I was lucky enough to have a toy to model off - it is the talking McQueen. When I was ready to carve, I just popped him on top and carved around the shape - super cheating I know!
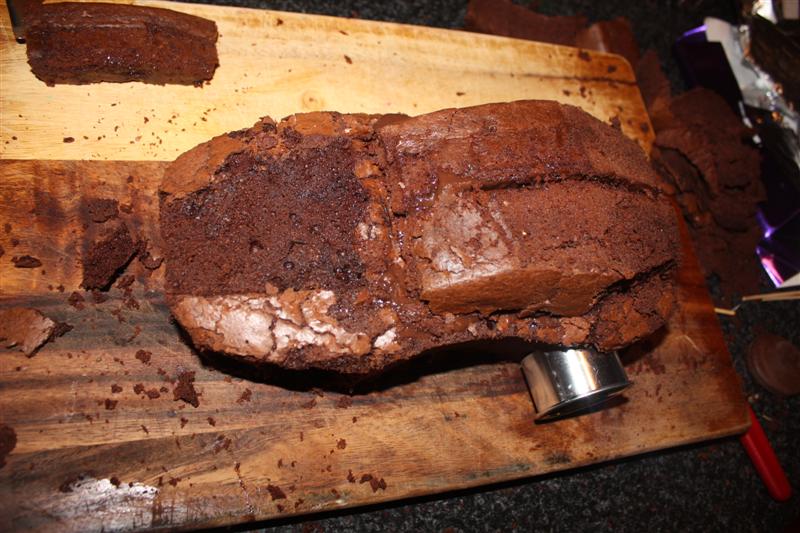
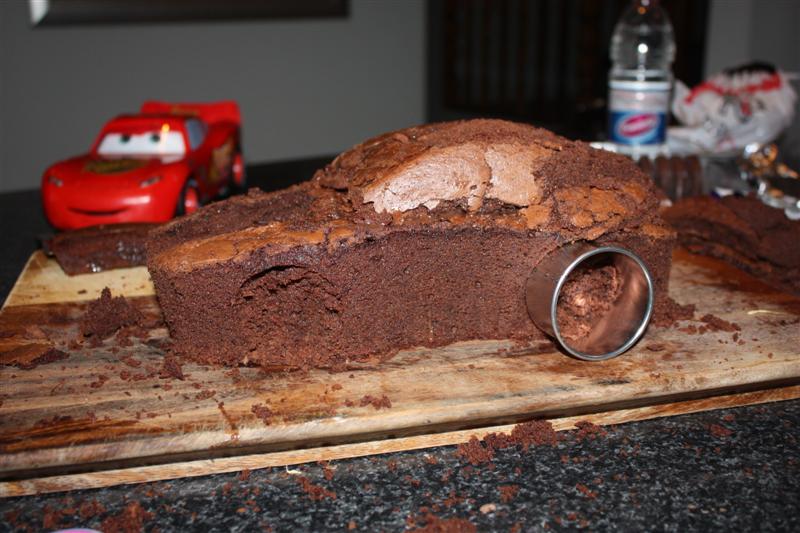
I trimmed the excess side pieces of the oval so they were flat on the bottom and attached them to the top of Lightning with a layer of ganache and skewers. I had several skewers fastening the top level to the bottom level but also needed a couple to attach the two pieces on top to each other so they stayed together (horizontal skewers and ganache). I then put Lightning beside the cake and again trimmed around him for the shape - unfortunately I didn't quite have enough cake on top to shape the back end properly.
I then just went around freehand fixing the shape and smoothing it a bit and very lightly carved a little off the bonnet - not too much or you end up with a big pothole.
I found that Mint Slice biscuits were the perfect size for his wheels. I found a cookie cutter the same size and cut into the cake a little so that the wheels would fit in. I used a knife to gently pull out a little of the cake - don't go too deep or your cake won't be able to support itself!
For a spoiler I just used a thin piece of card. I traced the shape around the spoiler on the car and then extended the shape long enough at the bottom to sit in the cake (almost to the bottom of the cake). I attached it by cutting a slit and sliding it into the cake and then covered the entire cake in ganache (including the cardboard).
Next was the fondant. This is where I went most wrong. I chose a brand of fondant that was already coloured red (yay) but it was soooo soft and sticky that it was impossible to work with. I should have researched the brands a little more. My one was far too soft and I have since found that even the most experienced of decorators struggle to get a decent finish with this one but it did taste very nice! Anyway, we used about 1kg - 1.25kg of red fondant but we rolled it super thick. I would probably start with 1.5kg if you wanted to be on the safe side. To get how big to roll the fondant, we took the Lightning car and layed it on its side then rolled it up the bench (side, roof, side) and then give yourself a generous margin. For the other measurement we used his length and again added very generous margins to cover the front of the bonnet and the back of the car.
Once we lifted it on, we shaped it with our hands. Now, our fondant was too soft so it gradually kept sliding down the cake and we had to keep moving it back over the next few days - it is why I don't have a crisp finish. The upside was tears were supereasy to fix!
For the wheels I used pre-coloured black fondant (same brand). Before I covered the biscuit, I took a little cookie cutter and cut out the center of the layer of mint. I then covered the wheel - you have to start by pushing it into the center then wrapping it around or you get a giant air bubble. Once they were covered, I cut a red circle with the same small cookie cutter for the wheel hub and attached it. Then I pushed the wheel into the car - you might have to wiggle it a bit to fit but I found it fitted quite easily and snuggly. Then I took Royal Icing and piped it on with a Number 2 tip once it was on the car to say Lightyear. If you did before you attached it, you might smudge it while trying to get it to fit.
For the accents, I got a piece of baking paper and traced around the accents on the toy. I decided to leave a few off because I liked the look better. I also changed the 95 to a 3 (his age). To get the number in proportion I traced the height and width off the car again. I then cut my pieces out layed them over my coloured fondant pieces and cut around them. I also changed the front logo to say Happy Birthday Nate. I didn't need to use any type of glue to attach it because the brand really was so soft and sticky that it just stuck to itself!
We found that the spoiler just kept dropping because of the weight of the fondant, so I got a number of toothpicks and attached them along the underside of the spoiler and down into the cake - they looked like those lumpy things on the toy spoiler. The fondant was easy enough to manipulate and smooth over them but if you think you should use some toothpicks, it's probably a better idea to insert them before you cover the cake with ganache and fondant!
So there you have it - my instructions for making my Lightning McQueen cake. Hopefully they're of help to someone else.
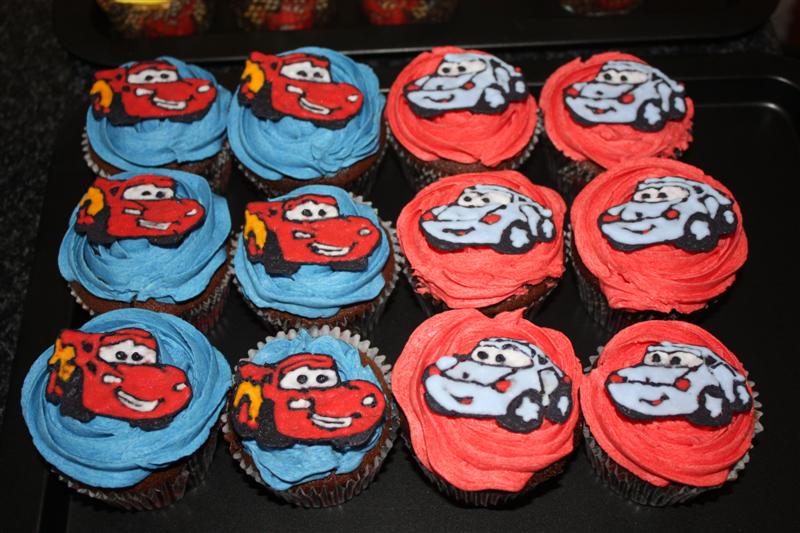
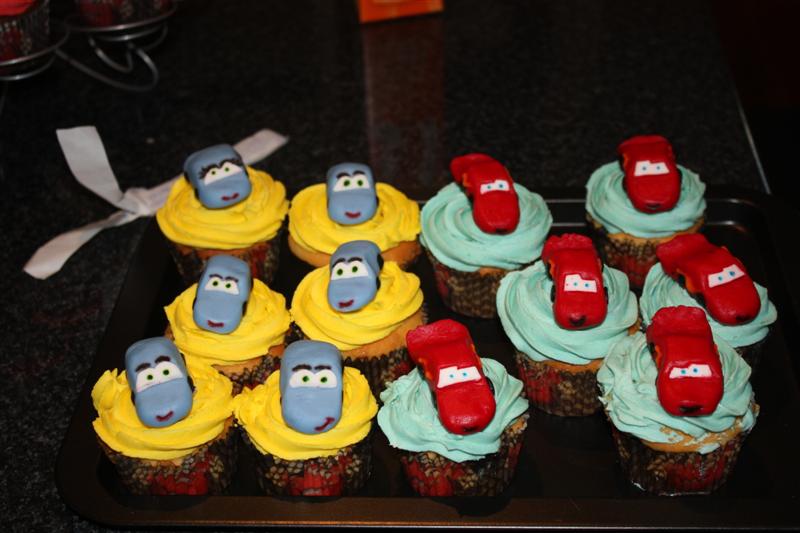
I also made cupcakes to go with my cake theme. I used Royal Icing with the flooding method for half of them and made fondant figurines for the other half (had the same fondant problems with them which is why the shape has started to distort on some of them!)
Sorry the pics are backwards - I don't know how to change their order!


Quote by @%username% on %date%
%body%