

Lady Emerald


My lovelies, may I present “Lady Emerald”, a concept I came up with last month/last year meant to pay tribute to this year’s Pantone color of the year-Emerald green.
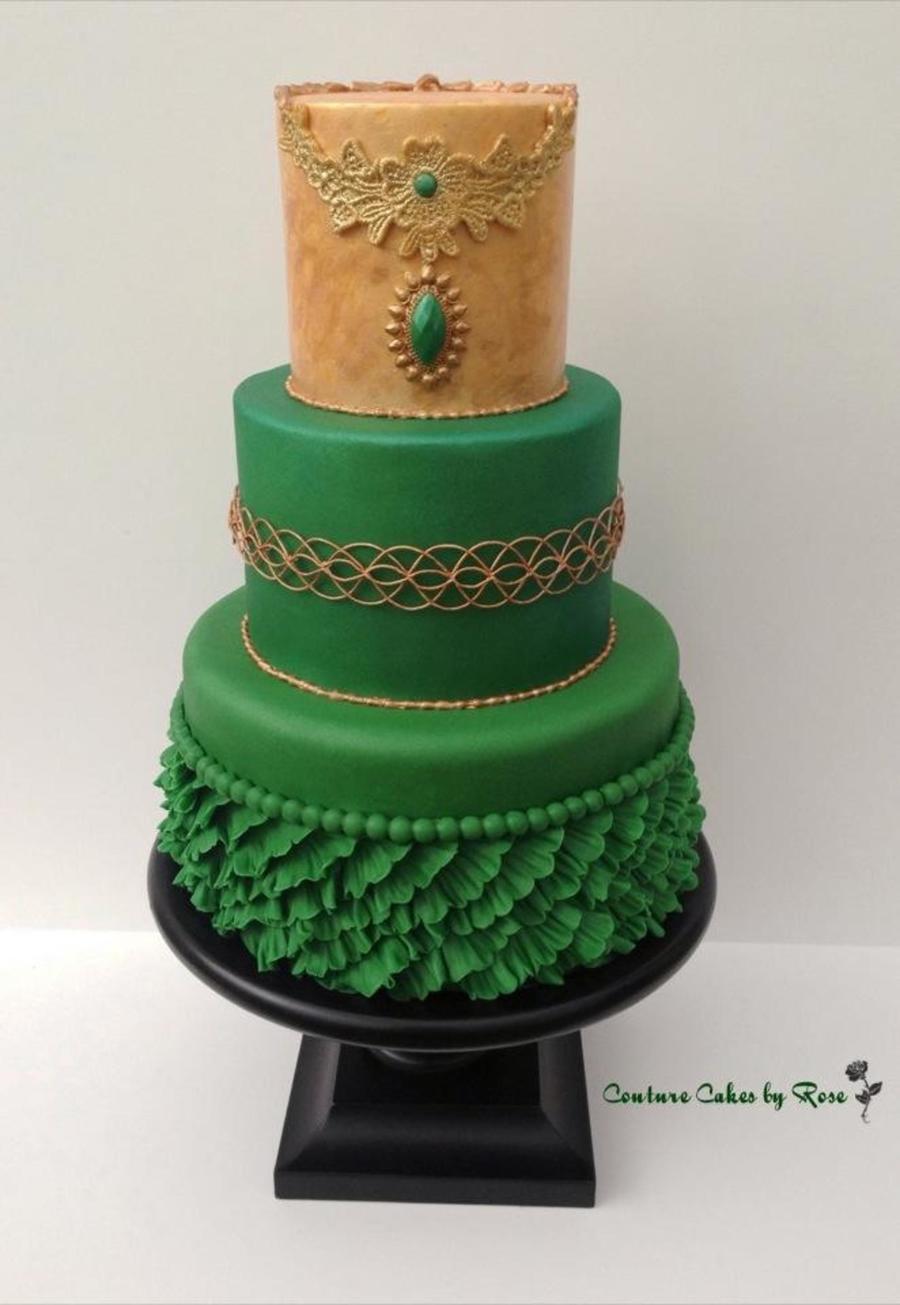
The top tier was covered in yellow fondant, then airbrushed in gold x two coats, I then used clean loofah to dab more gold paint on it once the airbrushing had dried off. I wanted the top tier to be more rustic. The gold paint I used is gold and bronze luster dust dissolved in gold airbrush color (the bronze luster dust adds more depth to the paint). It is accented by a “necklace” made from two of my handmade silicone molds and piped royal icing for the string on the top of top tier using #352 Wilton tip, then painted in golden bronze. The lace accent was made using a yellow fondant, then dry painted/dusted with gold highlighter dust. I took a small pinch of moss green fondant, rolled it into a tiny ball and pressed it into the center of the lace flower, then dusted that too with emerald green luster dust. The pendant brooch was done using the technique shown in this video tutorial:
The middle tier is covered in moss green fondant, then dusted with emerald green luster dust. I then used royal icing string work to decorate it then painted the string works in gold once it has dried (a feat that must have taken 10 years off my life, but luckily, I didn’t break any of the string works, woop woop, lol). I used a liner number 0 paint brush to do the painting.
Here’s the link to the video tutorial on how I did the string works:
The top two tiers was bordered with a very simple piped royal icing using #3 Wilton tip.
The bottom tier is 5 inches in height (I think it would have looked better if it was 6 inches in height as it would have given me more “drop” for the ruffles). It was again covered in moss green fondant, I then used a 98 mm round frill cutter to cut out a disk, used the bulbous tool to do the frilling then I cut out the middle portion using a 36 mm plain round cutter. I then cut the round frill in half and attached it in a slanted manner on the side of the cake leaving 1.5 inches free towards the top of the cake (The ruffles took forever, get your percolator out and prepare to drink lots and lots of coffee. My fingers was numb, ufff). I used a string pearl mold to finish off the bottom tier.
Here’s a link to a video tutorial which will show you how the frilling is done for the bottom tier.
Thank y’all soooo much. xo-Rose


No Comments Yet