

Could Use Some Advice On First Car (Truck) Cake.
Decorating By confectionsofahousewife Updated 8 May 2014 , 6:16pm by TreatsRSweet
I am doing my first 3D carved truck cake next week. I've got some ideas on where to start. I am going to use some pictures and blueprints (if I can ever find any) to help carve the proper shape. Any tips on doing this, though, would be greatly appreciated!
My major question is how do I elevate the car off of the board to give the illusion that it is not sitting directly on the ground? I have read about putting a styrofoam separator under the cake that is slightly smaller than the cake. That sounds like a good plan, but does the cake not droop over the sides of said separator? Or should the cake be sitting on a same size board? But then how do you carve out the wheel wells?
Also, what is the best way to get an indentation in the bed of the truck? I'm afraid if I carve the bed of the truck out the weight of the fondant will tear down the sides of the bed.
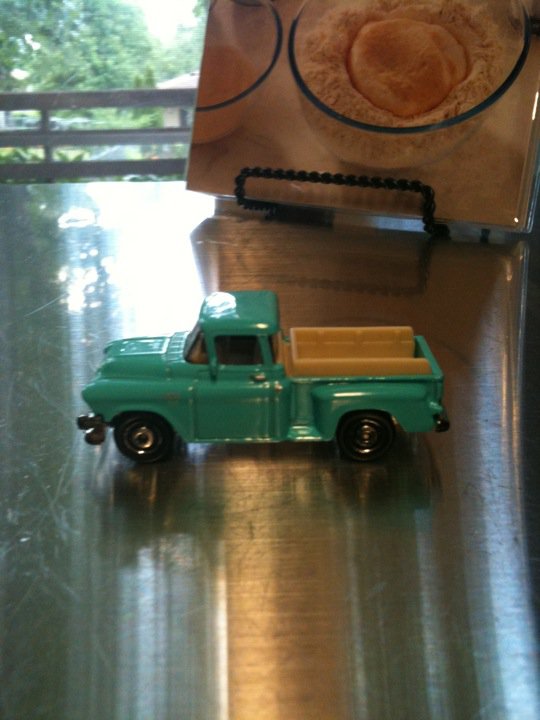
Thanks for any advice from experienced car carvers. This is a 1957 GMC 100 series pick up. Here is a pic. Thanks in advance for any advice!

to elevate:
http://www.cakecentral.com/cake-photo_1478285.html
for bed: don't make if full thickness of cake and instead build up sides higher with fondant.

You don't have to worry about finding any blue prints. You have the scale model so you can use that. Take pics from the same distance of the side and top of the truck (lay the truck on it's side and snap a pic of the top from the same distance as the side pic). Then blow that up on a copier to the scale you need it (amount of servings). Cover with clear packing tape and voila you have your template (this is the extremely condensed version of Mike Mc Carey's instructional dvd - well worth buying by the way!). Use this template to carve the top and sides then you can cut out template pieces for the other various elements and they will be the correct size and dimension. Use 1/2" foam core underneath per Doug's diagram. I've done a couple of car cakes (I"d attach them but it always takes me forever to resize the pics so just see my gallery if you'd like).
For your worry about that indented area on the bed. I would ice my cake on 1/4" foam core. Carve out your indentation in your cake using your template. Then after icing the whole cake but before covering with fondant take a sharp knife and cut around the bottom of your truck creating the shape and leaving foam core for the instep on the bed. Then your raised areas over the tires will remain supported and you won't have to worry about anything falling. After cutting out your shape you prop it up on that 1/2" foam core that will be raising it and cover it with fondant. Use your template for tire size and placement.
Hope this helps. Mike's DVD makes it so simple and you get a perfect, to scale cake. I even did it for a boat and it worked like a charm.
good luck!
forgot to add that if your cake is rather large you should probably put it on 1/2" foam core to start since 1/4" might not be strong enough to hold it. That all depends on the side of your cake, however. I have done all of mine using 1/2" foam core. Except for my first practice cake (that Hot Wheels cake) I used cardboard cake board and as it absorbed oil from the cake and BC it became soft and gave way under the trunk so, I definitely recommend foam core for this application.
Doug, if I'm reading your diagram correctly I cut notches for the wheels out of the cake board in advace? Is that right? Your suggestion was my plan for the bed of the truck. I think I will build up the sides with fondant or modeling chocolate rather than carve a deep bed out of cake. And that particular model has a custom bed insert that I will make out of gumpaste so it stands up over the edge of the bed.
Cakediosa, I wish I had found out about Mike's dvd sooner. I just read about it yesterday but with the cake being for next weekend (the 10th) I'm afraid it wouldn't get here in time. Unfortunately I don't have the scale model. A friend took pictures of it for me but I imagine I could tell explain to her how to take different pictures like you just told me. That's a great idea. This is probably simple but, having not seen mike's dvd, do I use the side templates first or the top template first? Seems to me I would use the side templates first and then use the top template to shape it up?
I think 1/4 inch foam core should be fine. This cake does not need to be huge.
Thanks you both so much for your suggestions!
Oh my word! Cakediosa I just looked at your photos. They are awesome! I love the Woody. So cool. I hope mine turns out half as good as yours! I have a couple more questions. What do you use for the tires? My first thought was just fondant but, unless they are totally dry, I can see them squashing down a little after I apply them to the vehicle. Also, in the woody photo you said you painted it with confectioners glaze to make it shiny. Is that the same as edible varnish? Thanks again!
yes, cut notches first. then you have a template for cutting the cake as well!
re templates -- do side first will be easiest -- BUT do not remove what you cut. LEAVE it in place until you cut the top template.
Do you know someone who does woodworking?? Especially making cabriole and similar complex curved legs for tables using a band saw (or just who does lots of band saw work)? If so have him/her show you how they use a double template to make complex cuts like cabriole leg by leaving the waste material in place after the first cut. It's the SAME technique for doing it with cake (just messier in cake and we do get eat the trimmings!)
Hmm.. my neighbor does some woodworking. I'll have to ask him. What is the purpose of leaving the trimmings behind? And how does that work? Do they not fall off?
leave the trimmings (waste in woodworking) so easier to cut the next part of the pattern.
see the video on this page -- he's making a miniature leg but the technique is the same no matter the size.
http://tallminiguy.blogspot.com/2009/04/video-how-to-make-cabriolet-leg.html
Great video Doug. I LOVE woodworking!!
I remove my trim pieces as I go. Although as I look at that video it does makes sense to leave them in place because when you remove them after you have carved the profile you have to place your top template over the curvature of the car versus a flat surface if you leave your scraps in place. Either method will produce your shape but it may be easier to cut with them in place. You do cut the sides first. Cutting only about 1/2 way through the width of the cake for one side then flip your template (or if you've made two templates then the other one should be in place on the other side) over to the other side and carve the other 1/2 away. Then place your template on top and carve and this will give you the shape of your car.
Confectioners glaze is an edible varnish so, yes, I assume it's the same. Tires are fondant with a bit of Tylose added and left over night to harden. Once you've done your template you'll know exactly what size your tires will need to be so you can make them in advance or yes, they will squish down. I cut my tire notches after the whole cake is iced and carved, also after I've cut it out around the bottom and after I've covered it with fondant. Use template to find position. Slide cake just over the side of the table (carefully!) then cut in from the underside however deep you need and however long. Remove foam core and cake. Use circle cutters to create the wheel well hole and cut into cake. You know, Mikes DVD shipped really fast so you might get it before the 10th and again, you learn so much from his technique that you can apply to other things it's WELL worth having.
Also, I use http://www dot the-blueprints dot com for scale blueprints. Insert actual "." I just typed it that way because sometimes web address are filtered weird on here. It's free and they have an endless amount of scale drawings of just about anything under the sun. You may find your template there. I found the lamborghini scale drawings but not the Ford Woody. I just did the pic trick with the Ford and it works just as well.
With the input you are getting here it'll all makes sense as you start to carve your cake! You'll have to be sure to post the pic when you're done!
This part I'm not sure I understand. You're cutting around the bottom of the car after its been carve? After icing and covering in fondant? Before? Do you actually cut the cake or are you cutting it so the foam core is the same size/shape as the cake? What are you cutting from the underside? Obviously I've gotten lost somewhere! Sorry. Thanks for being so patient with me!
also after I've cut it out around the bottom and after I've covered it with fondant. Use template to find position. Slide cake just over the side of the table (carefully!) then cut in from the underside however deep you need and however long. Remove foam core and cake.
Yeah I think I may try and order mike's dvd anyway. Maybe I can get it shipped overnight? I checked the blue prints website but they don't seem to have any vintage truck blue prints. Per my dad's idea, I requested the shop manual from the library for 1957 chevrolet truck which has the same body as the gmc so hopefully that might have some images. I also asked my friend to take better pics of the model so I can use those for templates in case I can't find any kind of blueprint.
As far as the confectioners glaze, the recipe I have has gelatin, water, and glucose in it. Is that similar to what you used? I just want to make sure I get the effect that I want and I've never used this recipe before I just saved it in case I had a need for it.
Doug, thanks for the video! That's awesome.
Alright I bought Mike's dvd. Now lets cross our fingers that it arrives in a timely fashion. Although I've now realized that it will probably be slower since this is a holiday weekend!
I had these big plans to make a semi for my gandson's birthday this past March. Researched on CC and looked and looked and cake pics. Then I read a post abut getting Mike McCarey's DVD....so I ordered. I was so excited when I got it and could not wait to watch it.
Well....after watching it several times I decided not to do the semi. The DVD is excellent and well worth the price and Mike does make it "look" so easy. But I guess I didn't have enough faith in myself so I chickened out.
Oh, I tried that recipe you have and didn't like it for this application. It "dries" blotchy and not smooth. What I use is CK's Confectioners glaze. I buy it from my local cake guy and don't know if most cake shops carry it but I know Jennifer Dontz sells it on her website and she ships mega FAST www dot sugardelites dot com.
Go back to my gallery and look at my dragon cake here's the link: http://www.cakecentral.com/cake-photo_1715126.html.
There is a picture of him being cut and under that you can see the foam cutting technique I'm talking about. You can see that he isn't actually sitting directly on the wood but is on his foam core. So, prior to placing him on the wood stand he was on a full sheet of foam core. I then cut out his exact shape, transferred him to the wood stand and THEN covered him with fondant. This is so you can pull the fondant down over the foam core and have it covered. So, with my car cakes it's the same thing. I carve and ice over a full sheet of foam core THEN cut out it's exact shape, place it on something raised then cover with fondant so the foam board is not exposed and you have all of the support you need for your actual cake.
The dragon picture really shows it well. Ask whatever you need to! I'd love to see you succeed with this and am sure you will do fine! I remember when Peridot was asking me about the semi truck. What I do is play the dvd in the kitchen and pause it when I need to so I can work in real time with the instructions right in front of me and rewind or repeat when needed. It's like having a private class!

LOVE THIS SITE!! ALWAYS SUCH GREAT INFORMATION.
Oh I already looked at your dragon cake! He is awesome. I didn't notice the pic of him being cut though. What you are describing is exactly what I was picturing but wanted to make sure I wasn't misunderstanding! I like that method because the foam core ends up being the exact right shape. I'm glad I asked about the confectioners glaze. I had no idea you could buy it! I have only one cake supply store and she doesn't really sell much but she does sell some CK products so maybe she'll have the glaze. You think if I ordered today from Jennifer's site it would be here by next Friday? You never know with those kinds of things.
Peridot, that is not the vote of confidence that I need ![]() I'll bet you can handle it! I just hope mine turns out half as good as the ones I've seen. You don't want to overnight me your Mike dvd do you?
I'll bet you can handle it! I just hope mine turns out half as good as the ones I've seen. You don't want to overnight me your Mike dvd do you? ![]()
Thanks! I'll give that a try. On a semi-unrelated note, when you did the dragon cake did you use a template to help carve it or did you just free hand? Just curious. I am scheduled to do a dinosaur cake later this month but havent decided if I'm going to do a 3D carved cake or not. I'd like to just for the practice.
Free hand. His body was two 12" ovals. Arms were 6" rounds cut in half and legs were 6" ovals cut in half. Tail was from a mini bundt pan and the head was RKT that I just made the right size for the scale. Referenced some other cake pics (Mike Mc Carey's dragon cake specifically) for musculature, shading and texture ideas. Used my fingers and ball tool to create the indentations for the musculature. Diamond cutter (cut shapes in half) for the spiney things. Free handed a template for the wings.
Well he's awesome! I asked because if I make a 3D dinosaur cake, it will have to be lying down like your dragon is. The customer will be transporting it over an hour in the car so I would rather not have anything that is standing up. Using oval cakes is a great idea. I never would have thought of that but it gives you a bettter shape to start with. Did you airbrush or hand paint his color? I am seriously considering getting an airbrush.
confections of housewife (I've always LOVED your username by the way!!) I airbrushed him. I bought mine brand new in the box off of craigslist for $30. It's a Paashe' and I LOVE it. I then bought the air compressor from Michaels using a 50% off coupon. I had it for months and was afraid to use it. Then I just slowly started using it here and there and now I LOVE it. It adds so much dimension and life to cakes. To get the speckling I used a new toothbrush dipped in airbrush color and spattered brown, green, black and gold. Lighter colors on raised areas darker colors on recessed areas. So the green he started as was also MUCH lighter than I knew I wanted the finished dragon to be but starting with a much lighter fondant creates depth when you start adding the darker colors. I have no formal art training but got tips from a decorator who has and a couple of artists I know.
Under the dragon's head is a piece of foam core to lift the neck up at that angle. Glued down with melted chocolate and the space between the back of the head and the body (the neck) I filled with cake caulk (crumbled cake and icing smushed together). Also, on top of the ovals and toward the rear end is a 1/2 of a wilton sports ball pan to create the hump. I then just shaved down the top edges of the oval and had a good shape to start with. It looked ridiculous and like a rat or a possum to me and i hated it until I covered it with green and added the wings and claws...then it started looking like a dragon to me. It ended up one of my best pieces of work to date.
Craigslist! I never would have thought to look there for an airbrush. I'm not even sure I would know what to look for. I didn't know Michaels carried air compressors. In which aisle? My birthday is this month so I'm hoping my husband will spring for one. I can totally see being afraid to use it. I have heard several people say they got one and it sat in the box for months before they got the guts to use it! I'm sure it takes some practice. I just feel like I could get better color with it. Do you always start with a colored fondant and airbrush on top or can you just start with white and airbrush? I would love to be able to airbrush darker colors rather than have to color lots of fondant.
I would definitely agree the dragon is one of your best pieces of work! I think being able to airbrush gives such a realistic look that is hard to achieve without one.
Thanks again for sharing so much information with me! I can't tell you how helpful it is. I saw some awesome photos of car cakes on flickr but the decorator specifically said in her profile that she was not willing to answer any questions regarding technique. Anyway, I'm grateful that you were willing to share. Oh and I love your signature line! Cake disasters ARE like childbirth. How quickly we forget...

Doug, I am making a truck cake topper for my nephews graduation cake. Can you give some directions and details on how to put the topper together. Thanks.
Quote by @%username% on %date%
%body%