


How To Make A Two Part - 3D Mold Of A Human Figure.
Decorating By MYOM-Dominic Updated 11 Jun 2010 , 9:27pm by marzipandoll
Once again it gives me great pleasure to introduce "Marzipandoll" who has taken her new found mold making skills to another level. In the last tutorial Marzipandoll and I made a mold of a cute little doll which she transformed into a princess and a mermaid. Once that was finished, Marzipandoll expressed an interest in making a mold of a larger figure that is more adult in shape and could be used more universally in many cake designs.
I thought that this would be a good time to introduce another way of make molds that incorporates the use of both Silicone Plastique and Silicone Spread. This is a really great mold making method and one I use all the time. For instance, if any of you saw the chocolate Abraham Lincoln bust that was part of the show cake presentation at the ICES convention last year, I will confide that it is this method that I used to produce that impressive sculpture.
The benefits of this method that Marzipandoll will be demonstrating can reduce the amount of silicone used to make a mold by more than 50%. You will also be introduced to the concept of using a support shell which keeps the two silicone skins together. This can really be helpful when making sculptures of large projects like statues, buildings etc.
And now, without further delay, I would like to turn this tutorial over to the talented and amazing Marzipandoll.
Thank you Dominic, again I had fun and thank you so much for the opportunity! You rock!
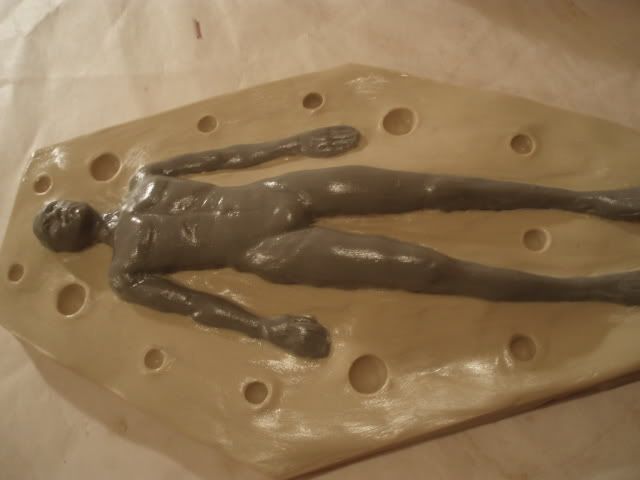
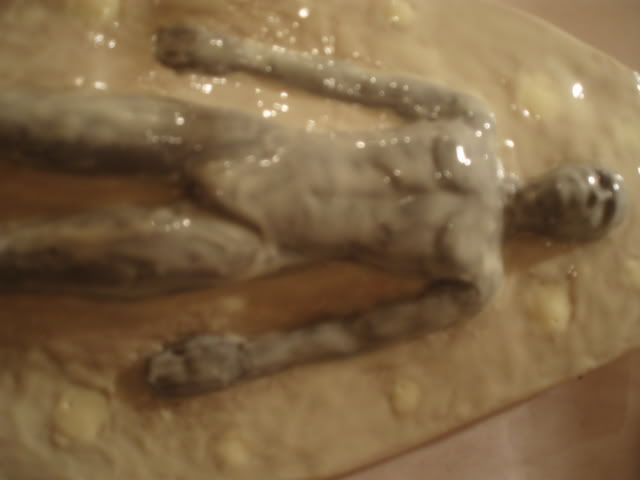
Ok here goes. Preparations. First I made my clay people and baked them. I wanted to have a male and female figure, naked and bald so I can make them into anything I want. (Used a sharpie for the line, and tried to put it exactly in the middle.)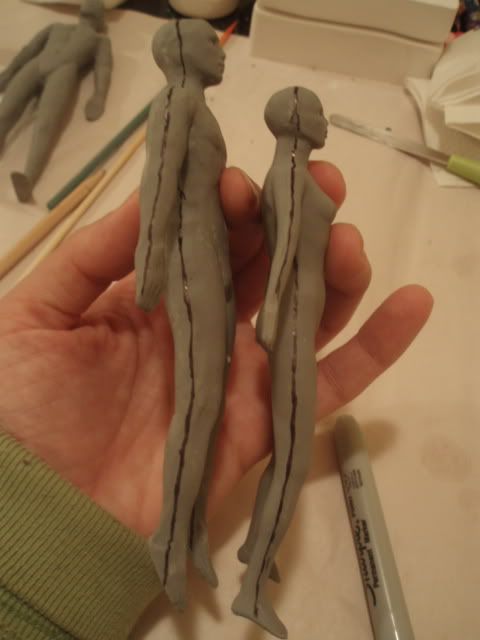
All the things I used for the mold...Dominic's materials.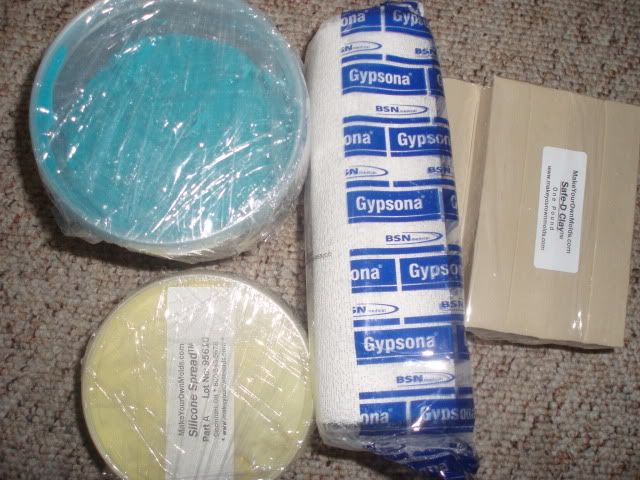
My first time using this clay for the clay bed, it was so smooth I just wanted to keep working with it. ![]()
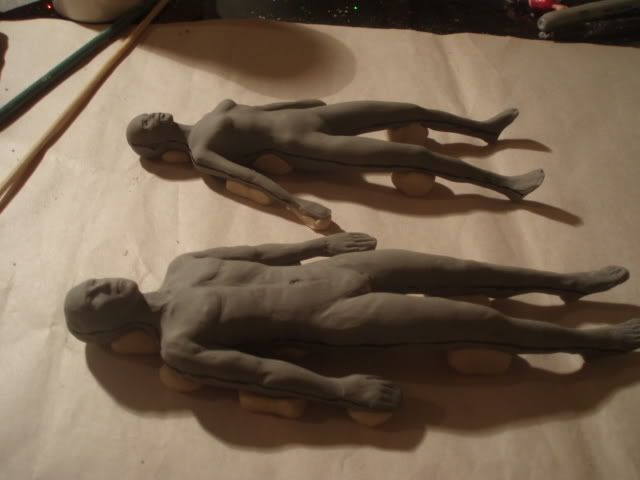
Since my people didn't have a flat back against the working surface, I had to support them with a little ball of clay. Neck, small of back, hands, knees. After that there was not a point you can poke my figure to move it out of balance. It was just stabile on the table. 
Clay bed.
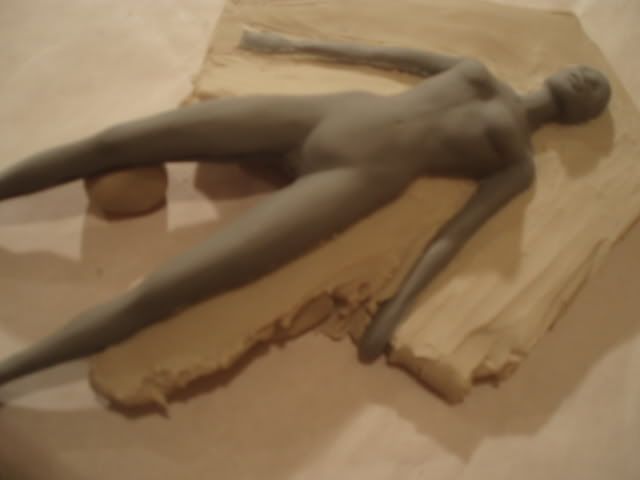
I just started to build clay around the figure. I had to make sure that there were no spaces and cracks between the girl and the clay. And that the clay came up exactly to the half line. The clay came straight into the line so the surface of the clay bed and the line was in one level.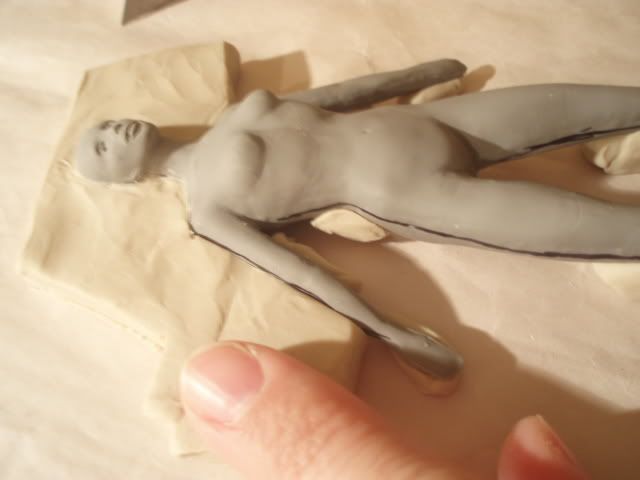

The back does not need to be filled in completely....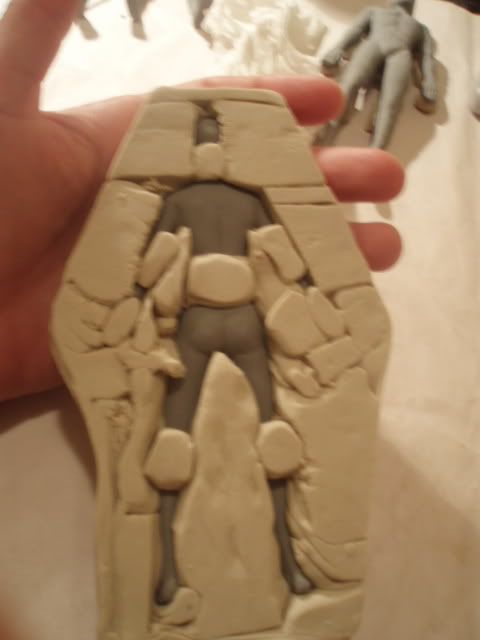
Even later on you can add more clay, or take away some. ( I had to add some to make space for the alignment keys. )
I did the same exact steps with both figures.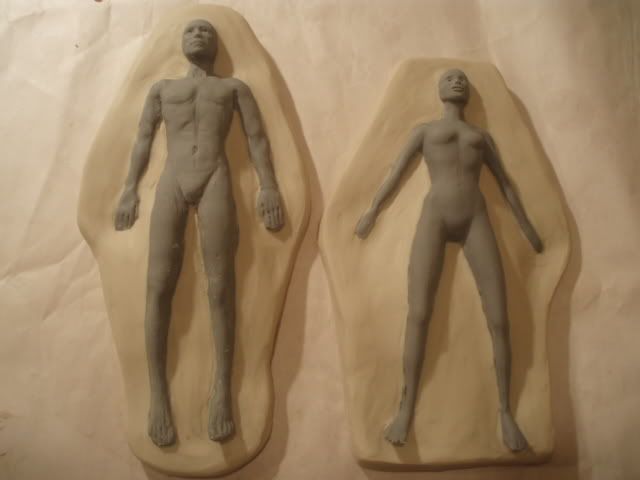
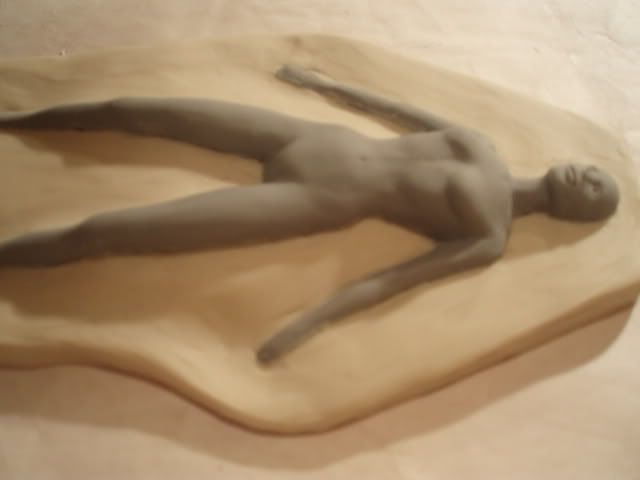
Doesn't matter how messy you are making the bed, at the end you can still smooth it out with your fingers.
I added some clay to make room for the alignment keys, and worked away any excess clay that came up with the smoothing.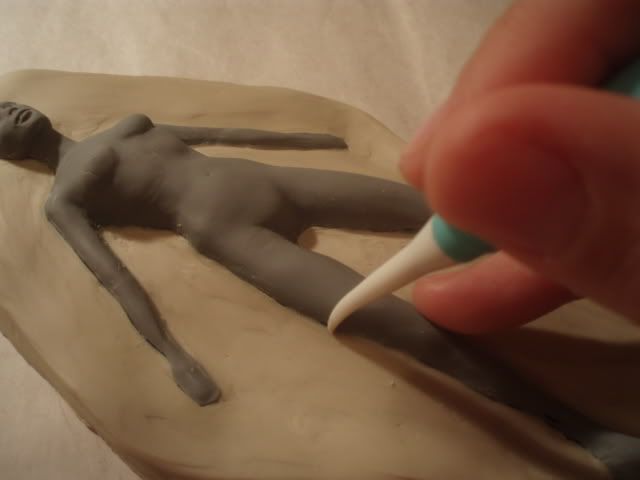
The alignment keys are just holes (sorry Chef) that will fit and hold the two parts in the right place. Add that with a ball point tool.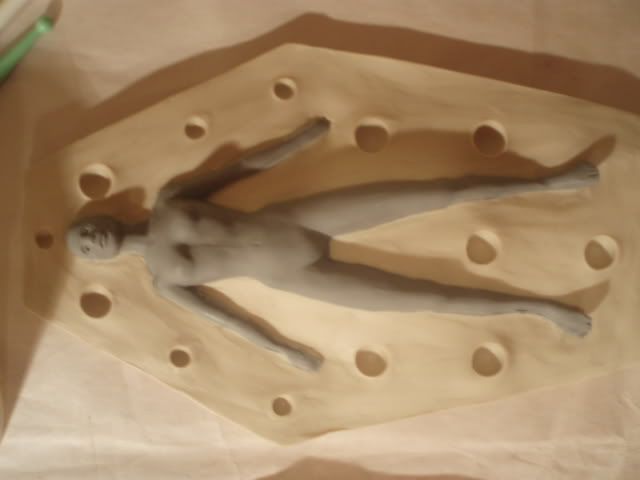
Release dit. Didn't show that in "all I needed to make this mold" pic. I had some already. So the release dit is like a grease. Again very smooth and all I had to do is massage my figure with it a little bit. Not too much, not where the grease is just sitting on the figure. Just enough to make it shiny. But everywhere. I used my fingers to put it over the surface of the clay bed, and the figure. But then I needed a brush to go into spaces like between the legs and under arms, facial features, and those alignment key holes. If you don't use the dit, you are making one big block of silicon as the Chef told me. ![]()
Silicon spread.
It comes in two containers. A part "A" and a part "B" one is yellow, one is white. This way you can see when it is totally mixed up. Once they mix up they activate each other and you have a time limit to work. Not like a putty, you do have time to do your work neat, but you just don't mix it and get back to it later. At first I just mixed 3 tbsp of each, part "A" and "B". It's very sticky so use a disposable cup. I put some in an old icing bag and filled the alignment key holes to the surface. Slowly from bottom to top.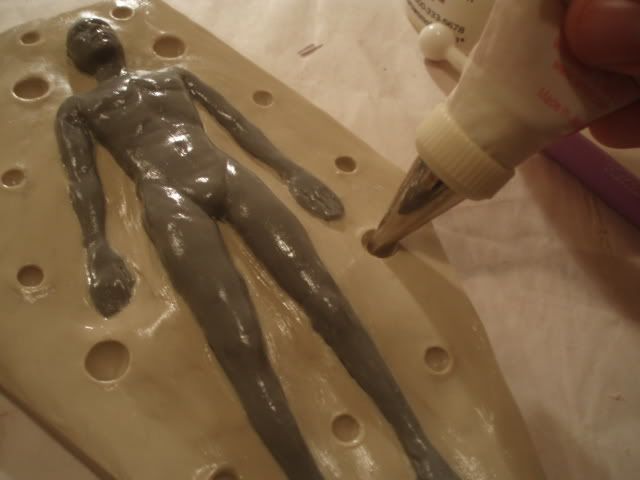
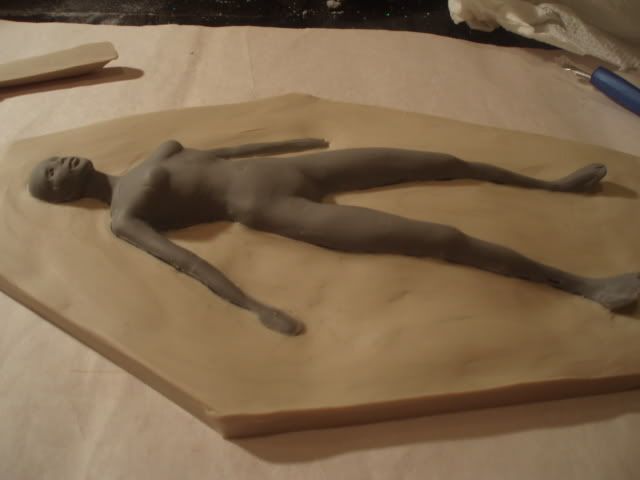
Then took a brush and painted a very thin layer of it on the whole surface of the clay bed and on the figure. I used a small brush too to get into those small details again. I gotta say here, I kept going back with my brush to smooth the spread out, and when I picked up the brush it kept picking it up. I just wanted to make it neat. Anyway I realized that I have to keep going and it settles down after a few seconds when I leave it alone, it just smoothes itself out. Also had to make sure when painting between body and clay bed to go into every small space with the brush, without creating bubbles. 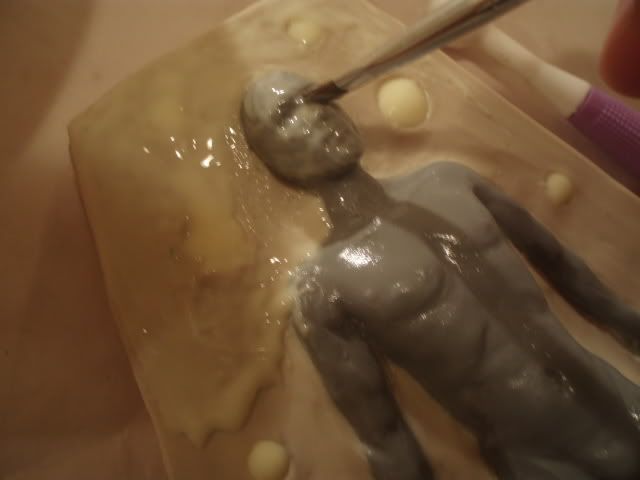
 (The side of the clay bed stays clean, only paint surface.) I left it to half-cure. About 1 hr. A test touch with the tip of a finger will tell if it's ready. If it's pasty and sticks to your finger it's not ready. If it's still sticky but more like a film, we can go for a second coating. This can be thicker but still look out for bubbles!
Keep jumping between male and female but like I said I did the same thing on both back and forth, trying to get the better pics.
After the second coat...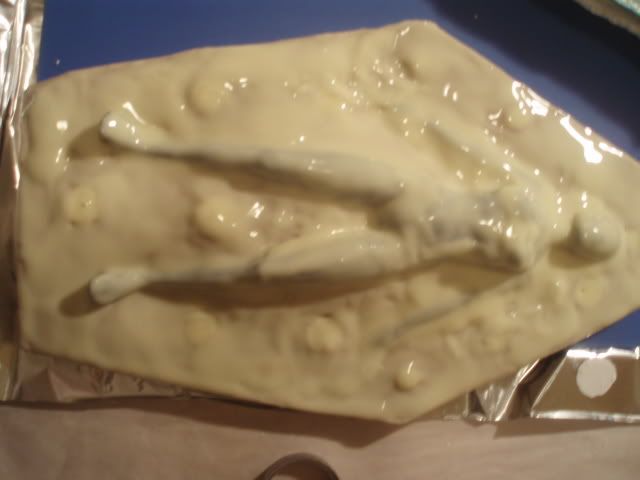
This I left to cure again like the first time. Don't let it completely cure because your mold will be like pages in a book. You want the yellow and blue to become one piece.
Silicon Plastique.
Again comes in 2 containers part "A" and "B", blue and white. This is more like a playdough feel. So nice to touch. ![]() Seriously. Anyway, you mix it all up to a uniform color. No white lines, all blue. You gotta use the very same amount.
Seriously. Anyway, you mix it all up to a uniform color. No white lines, all blue. You gotta use the very same amount. 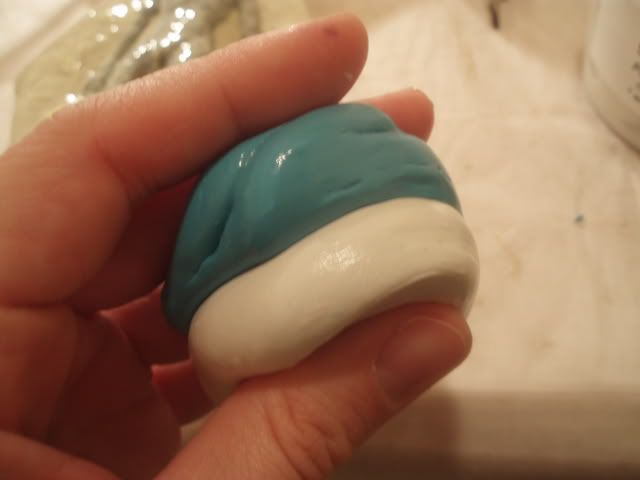
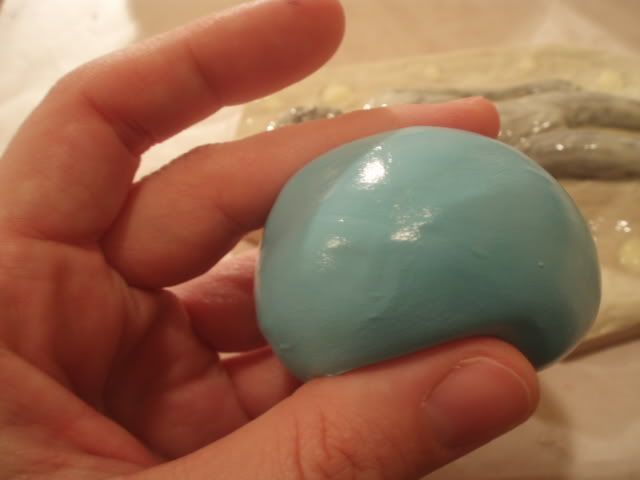
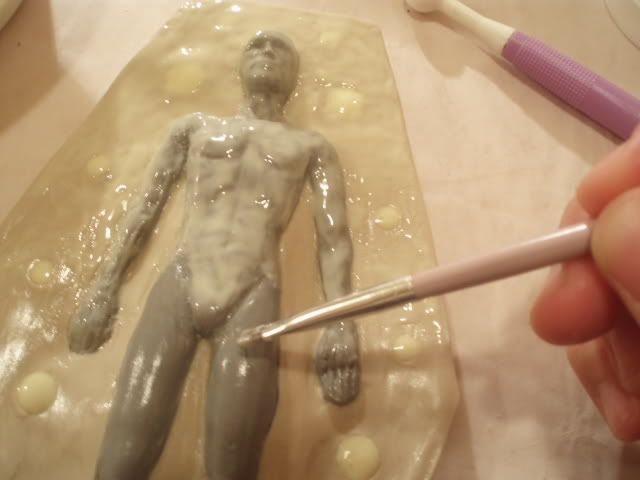
About 1/4" thickness starting from the top I started to smooth the plastique onto my clay bed, and figure. Again cover the whole surface. Work into every detail, press down around neck and in spaces, not to create bubbles. It's hard not to create no little bubbles at all, for the first time, but that's ok too as long as it's not on the nose for example! ![]()
This is so nice to work with too. Gives you enough time before it starts to cure, but you can feel it when it does, it becomes less flexible. 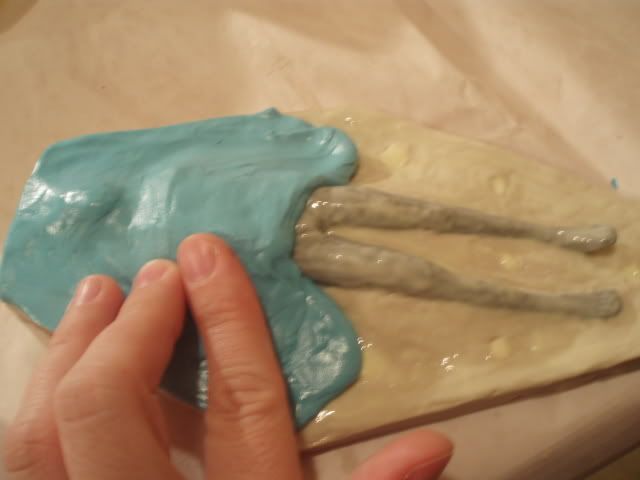
As you are working your way down, and there is no more material to push down, you can always add more, right on top of the old one pushing it down, so there will be no lines on the inside. I don't know how to say this better, but Chef Dominic has a video lace tutorial, and that's where I've seen him doing it. 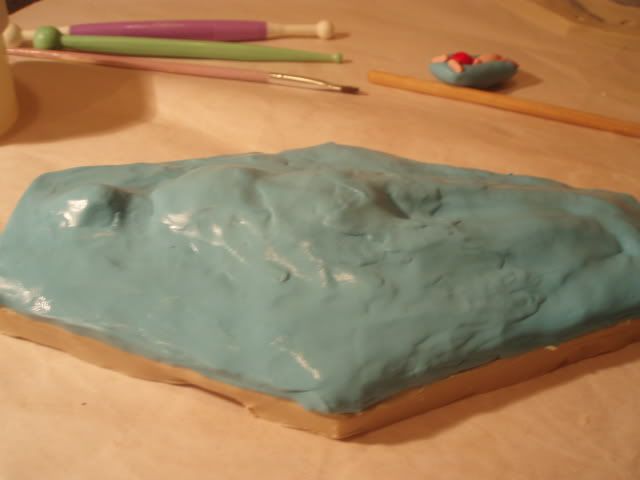
I think this cures in about 2hrs. I let it set over night.
Once this is completely cured I made the shell.
This totally reminded me of those old style hard casts, like the one I had when I broke my arm as a child. Comes in a roll. I had to cut 5 layers equal in size. About an inch bigger then the mold all around. Held the 5 pieces together (used gloves for this one) and dipped it in a bowl of room temperature water. No soaking and washing, just dip, get it completely wet and pull back out. You can gently squeeze the excess water so it's not dripping, but it should stay wet.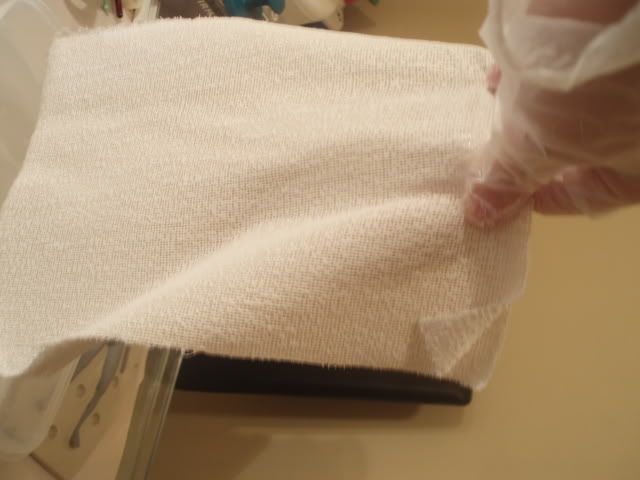
Lay it on the mold, smooth it out and fold the extra right back on top. 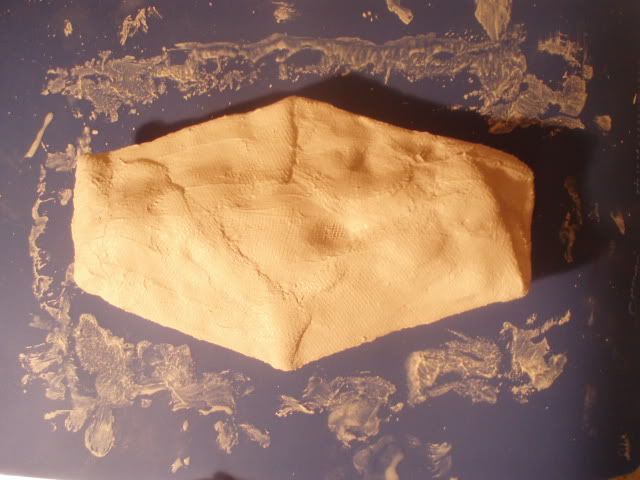
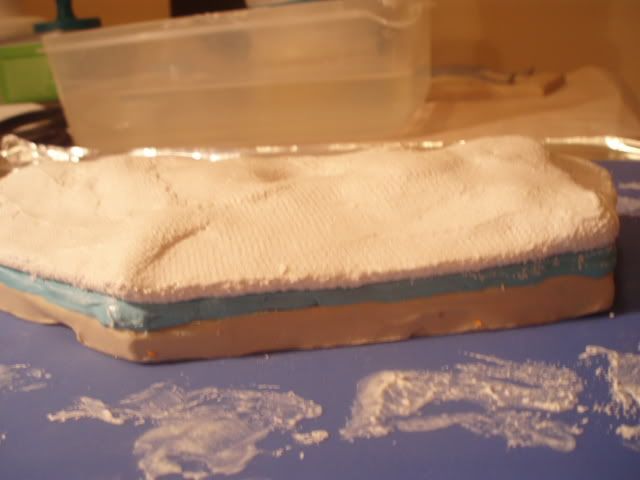
Note, there is no shell on the sides, I only covered the top. So when you look form the side, you see a sandwich of clay, silicon and shell.
This should take about 30 min, it's done when you can knock on it. ![]()
Then you turn it over and remove your clay bed. It's good as new, you can reuse it in your next project.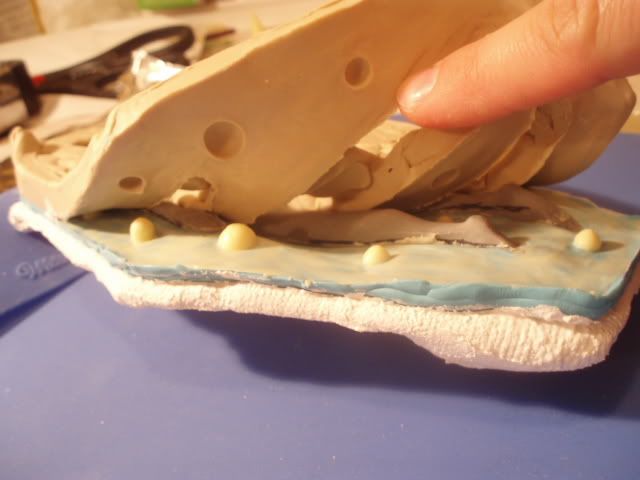
This is what I had. Keep the figure in the mold!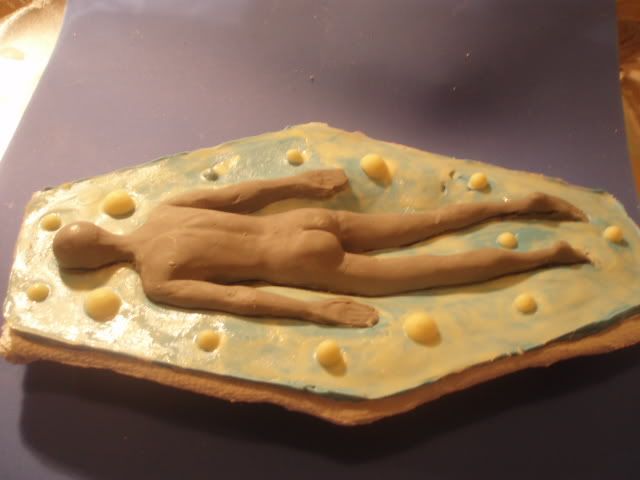
After this, is repeat everything. Starting with the release dit, to make sure it's gonna be a 2 piece. Brush it on the whole surface of the silicon mold, those alignment keys, and figure all over. Brush the silicon spread the same way and cover with the silicon plastique, then the shell.
I was actually scared to take them apart.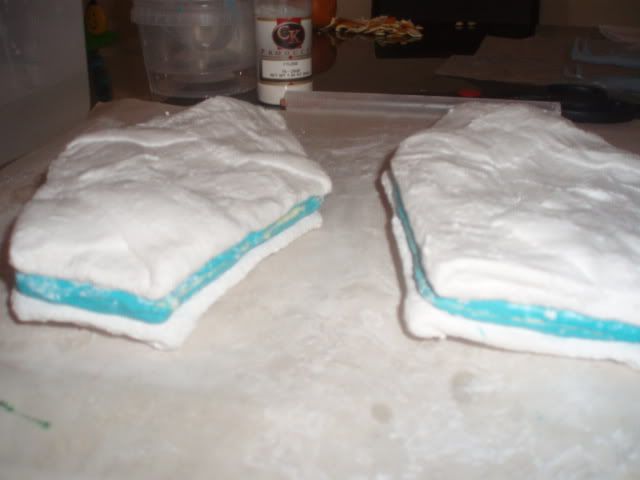
You can tell the male's face was the first one I did. It's good, but it got better when I used more coating of the silicon spread. ![]()
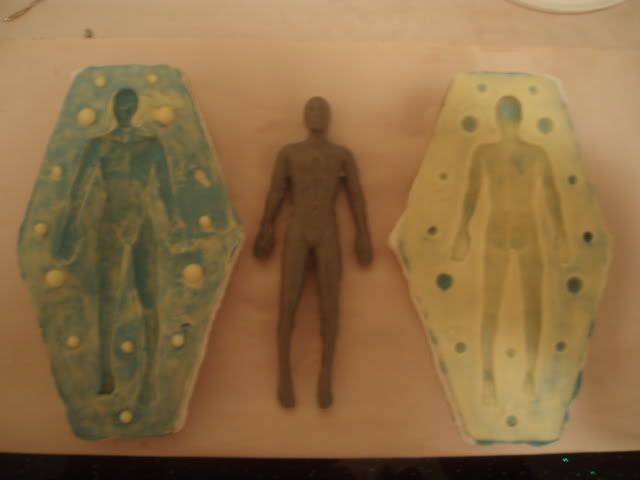
The female.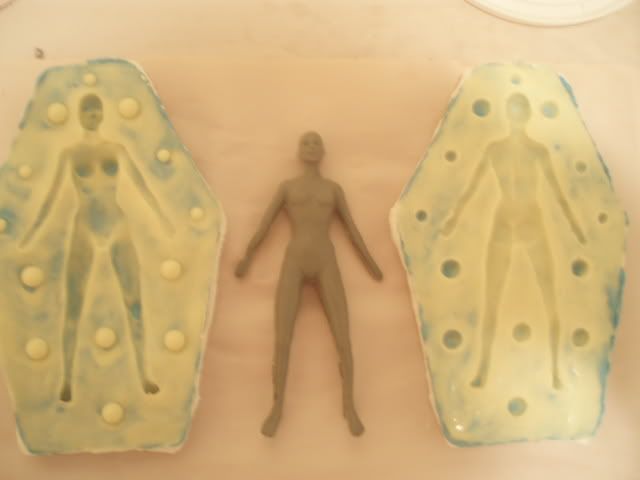
I have so many ideas what to do with this couple is makes my head spin. I just need a little time.
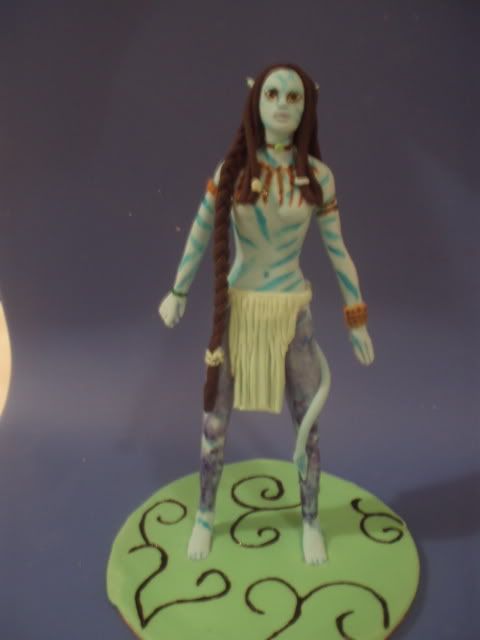
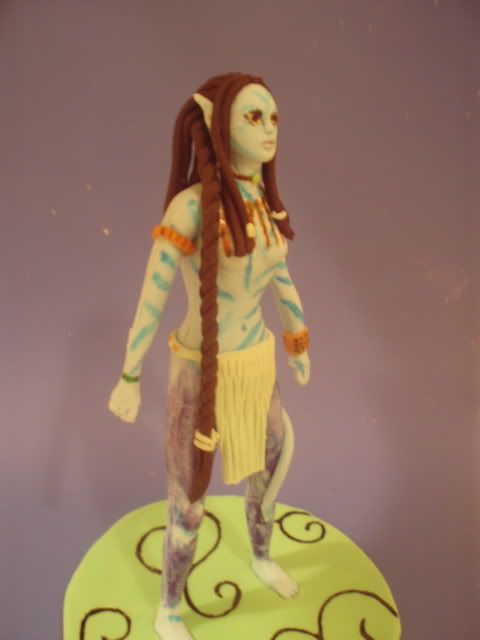
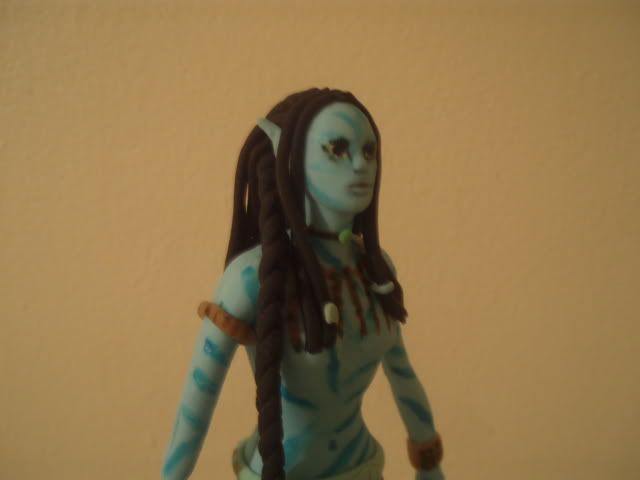
My first figure was inspired by the hit movie AVATAR! I am in love with the Na'vi people so I tried Neytiri. Not flawless, but I know how to do it better next time. ![]()
Chef what did I miss?
Marzipandoll - I think you did a fabulous job. I think Neytiri looks fantastic.
Dominic ![]()


Thank you Edna queen of tutorials! ![]()
jade-eye

The pictures look like something out of a sci-fi movie!!!
Whoohooo! I like a sci-fy movie! ![]() Thanks.
Thanks.
Quote by @%username% on %date%
%body%