


If you can't find anything, maybe this will help, here is a new DVD by Tonedna, HTH
http://www.designmeacake.com/id34.html
There is one or two in here: http://cakecentral.com/cake-decorating-ftopict-654803.html
I used a combo of the two Rylan posted - I would have gotten tonedna's DVD, but I needed mine done before she had the DVD ready.
Here is a link to the one I did, I am currently working on 37 more of them for tomorrow..... ![]()
http://cakecentral.com/modules.php?name=gallery&file=displayimage&pid=1521332
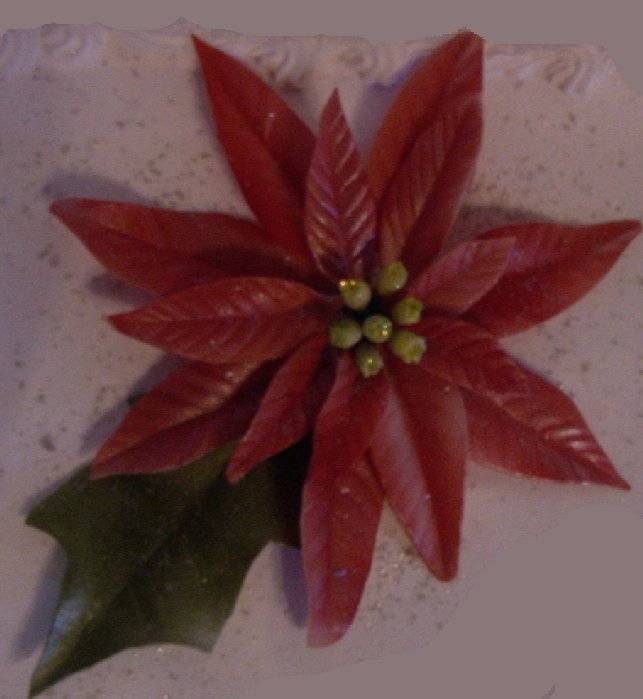
I used the small cutter set from GSA, airbrushed them, then dusted each one with luster dust, then assembled.
The cake was a huge hit, here are the pics of the work in progress on the poinsettias. I did 39 of them in total. My fingers are STILL sore! Thanks for the help and the comments on them.
http://www.cakecentral.com/modules.php?name=gallery&file=displayimage&pid=1532334
The cake was a huge hit, here are the pics of the work in progress on the poinsettias. I did 39 of them in total. My fingers are STILL sore! Thanks for the help and the comments on them.
http://www.cakecentral.com/modules.php?name=gallery&file=displayimage&pid=1532334
wow that is awesome, you do great work, I know that a lot of us will gain so much from your steps. Thanks again

I found some large PLASTIC poinsettias that I took apart to use the petals and leaves,as 'impression mats' to make my flowers. I let the fondant dry on the plastic petals a bit before removing them and that allowed them to retain the shape and curve of the plastic. I put them on the bottom side of the plastic so they would get the veining and airbrushed them when ready to use. I used little balls of fondant on wires that I shaped for the center portion, then a bit of luster to give them a shine and they were ready for a cake. I cut the petals in the basic shape with a pizza cutter and pressed them into the plastic, so my total cost for the 'equipment' was the 25 cents at the thrift shop for the plastic flower an some soap and bleach to get them ready to use! So many of the artificial flowers are silk now that finding the nice heavy plastic was a surprise and how well the poinsettia turned out makes them a keeper!
Very pretty!! That would not have worked well for me, I had to make 39 of them - so having the cutters/veiner was a huge time saver for me. If I only had to do a couple or so, doing it your way would work out great!
I did the centers with tiny balls of gumpaste too - first a green one, then a smaller red, and ending with a teeny tiny piece of yellow....no cutters for those. ![]()
I had a hard time finding a dust that I liked - I ended up mixing a few different ones - for the red, I used dogwood crystal colors, raspberry luster dust, and a tiny bit of super pearl. For the green, I used forest green and luster and petal dust mixed together. They had just a hint of sparkle to them - I really liked how they turned out.
They have removed the pics of the making process - sorry.
 thank you so much, I am so glad that you offered to send the photos.

Nope, that is where I put them. I got a pm saying they do not allow "progression" photos, and they were all removed. I don't quite understand the reasoning - folks can post 6 or 8 views of ONE cake, but they don't allow showing the process of actually making a flower?? Oh well, I love this site, and will follow the rules, even if I don't like it. ![]()

I did the same thing with my poinsetta. I used other cutters that I already had for the leaves. Used my two sided leaf mold from Jen Dontz, and made my centers using a technique with pliers. I actually did a utube video for it for a friend so its out there if you want to watch it. I never got a chance to do the leaf portion on video yet.
Quote by @%username% on %date%
%body%