


when i was taught to make the bamboo i used gumpaste. basically you follow an image and form a snake and then make it fat where you need to. i dont know if i am hlping much. then you paint it different shades of green and pain in brown. when i go home i can post a pic.
Wow thanks guys!! I'm totally flattered, and I'd be happy to tell you anything I can about the bamboo cake. It was far from perfect so I'm sure someone else could use the idea and give it their creative tweak to make it better. ![]()
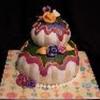
The pot in my photos is the cake part of this deal and the bamboo is fondant. The pot was a 9x13 cut into thirds, covered in fondant with a fondant rim, oreo cookie dirt, and fondant rocks.
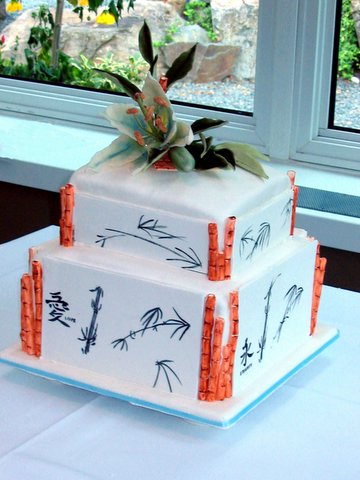
I did a search for real bamboo plants online when I was making the bamboo shoots for the cake and tried to make them as realistic as possible. I did them in fondant that I had colored a light green, and started out by rolling a short (3-4 inches long), fat (3/4-1 inch wide) snake of fondant and flattening the ends. Then I'd roll out another snake and do the same, then push the ends of the snakes together a bit (to give them complimentary contours so that when they were positioned together there wouldn't be gaps). Keep this going until you have enough to make an entire bamboo shoot. I made some that were 5 sections long, some 4, and some 3. I also made a really short stumpy snake for each bamboo shoot that was used for the very top of each of the stalks.
After I had all of my sections done I needed to have some way to hold them together and make them strong enough to stand up on their own. I was going to use dowels, but getting them into the fondant without totally messing up the shape I'd already spent time on was near impossible. I happened to have some florist wire on hand, so I ran a piece of that through each of the bamboo shoots, connecting all of the sections together as I went so that they were stacked up on the wire. I ran the wire all the way through all of the normal-length sections, but only a tiny bit into the short topper. You don't want the wire poking through the top of the stalk. If anyone knows of anything that's stronger than florist wire it would probably make life easier at this point! ![]()
For the leaves, I used the big leaf cutter that's in the Wilton gumpaste flower kit and cut out 3 leaves for each stalk and veined them like normal. Then I positioned them together and tried to make a little stump on the bottom so that I could have some way of connecting them to the stalk later once they were dry. (Am I making sense? It's late lol). For some of them I had to add a little bit of extra fondant on the bottom just to give them a nice nub, and then for each of them I inserted two toothpicks into the nub and left about half hanging out the end to give them a "spike" that could be used to stick them to the stalk..
Now, back to the bamboo shoots. As I sat there staring at them I realized that I was going to have to have some way to make the leaves stick out of the top of the shoot, curve out sideways, and end up sticking straight up. So what I did was run a second strand of florist wire up through the stalk, except instead of inserting it into the topper, I made it stick out right at the connection between the last stalk section and the topper, and then bent it out and up. To cover these I just wrapped little sections of fondant around the shaped wire, leaving a little bit of wire sticking out the top to help connect the leaves later on.
Fast forward a week so that everything has had time to dry and harden (note to self: make sure to tuck the drying fondant away so that the dog doesn't try to eat it and the cat doesn't try to sleep on it). (They didn't, but I had to keep a sharp eye on them!). Once everything was dry, I used the little leftover section of wire sticking out in conjunction with the toothpicks I had put in the leaf stems and stuck the pieces together. This is a little tricky and not the most stable setup, so I tried not to move them anymore than I had to after that.
Once they were all together I painted them with green gel color mixed with vodka to give them a darker color that had a bit of depth to it and let them dry.
When I went to insert them into the cake itself (the flower pot planter, I started out trying get them to stay standing up just by sticking the wires that were hanging out the bottom of each shoot into the cake, but that wasn't even close to being a good idea. They were way too wobbly, so I ended up cutting the extra wire off flush to the bottom of the stalk and sticking bamboo and all straight down into the cake so that it would be stronger and more likely to stand on its own. Even assembled, it wasn't very sturdy so I would reccommend not putting the stalks in place until you're certain that the cake isn't going to be moved again (It was wobbling like crazy from the kitchen counter to the dining room for a picture-op and back).
Ok.. It's late and I'm spaced out, so I hope this has made sense! Tomorrow I'm sure I'll come back and re-read this and have something to correct, but I hope this is a good start!
I'm attaching a photo to try and give a visual of the wire setup. The yellow lines are florist wire and the red ones are toothpicks.
If any of this needs further explanation don't hesitate to pm me! ![]()

I did this cake from American Cake magazine but I used a mold.

Quote by @%username% on %date%
%body%