


How To Make A 3D Eeyore Cake - Long!
Decorating By staceyd1984 Updated 4 Jul 2007 , 3:21pm by staceyd1984

How to Make a 3D Eeyore Cake.
To make this cake I used:
2 x 7x 3 rounds
1 x 8x 2 square (You may want to use a cake dummy for the head, this would reduce the weight, if I was to make it again I would more than likely do this option)
2 x rectangular cakes (about 7x 3 x 3) I made them in a loaf tin.
10 x cupcakes
Enough fondant to sink a small boat! Approx 5 kgs worth!
Buttercream
Dowels!
Large Board Mine was 16 square
Boards for inside the cake (I made my own by laminating cardboard)
1, Take the 2 round cakes. Put them on top of each other and chop a piece off the front to make it flat (the bit where the front legs will sit) The piece I cut was about 2 at the widest point (obviously being a round cake it narrows to the edge!) On the cake that will be the top cake you also need to cut a piece from the front where the head will rest but I did this at the point of assembly. Set the round cakes to one side and grab the square cake. At this point it may be worth mentioning you will need the trimmings so no eating! Lol
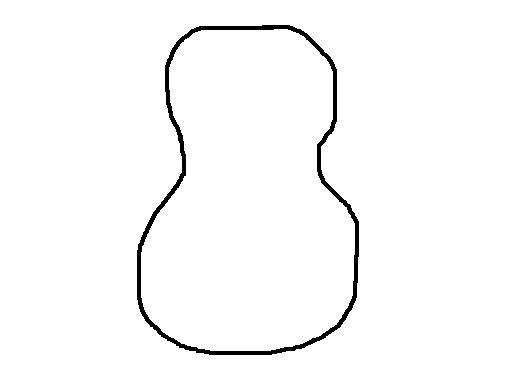
2, From the square cake you need to shape it to make the head. It needs to look roughly like the the picture below entitled eeyore head shape. I say roughly as my cake making is thankfully much better than my drawing skills!
3, Chop the top off a couple of the cupcakes. Using a bit of buttercream attach these to the bottom part of the head that will make the nose. This gives his head some shape. Use the other bits of the cupcake to fill in the gaps so its a smooth dome kind of shape at the bottom. Use small bits of cake to just slightly build up where his eyes will go to give the head some depth. Put the head to one side.
4, Take the rectangular cakes. These will make the back legs. You want them to make a smooth join with the body so grab one of the round cakes and shape one end of the rectangular cake to fit snugly against the round cake (in affect chop an arch like shape from the one end!) Do this with both of the rectangles. Put the round cake to one side again. You then need to work on shaping the legs. At the end you have just chopped the arch you need to reduce the depth of the cake by about an inch or so. I would say take an inch first which gives you a chance to chop off a bit more as youre shaping. You need to stop at about 3 inches before you get to the other end which will make the foot. Slowly taking off a bit at a time shape the foot making it rounded at all edges. Shape it down towards the leg and shape the legs to make them all nice and rounded. If you look at the finished product you can get more of an idea about the final shape. Put the shaped legs to one side.
5, Take the cupcakes. These will make the front legs. I used a whole cupcake for the foot, Shaving just a little from each side to make it a bit pointier as opposed to rounded. I levelled the top slightly too. Remember you will need 2 of these one for each foot. Take 4 of the cupcakes and chop them in half. Level the tops slightly on these too. Put these to one side as you will not know the exact depth these will need to be until the body is assembled.
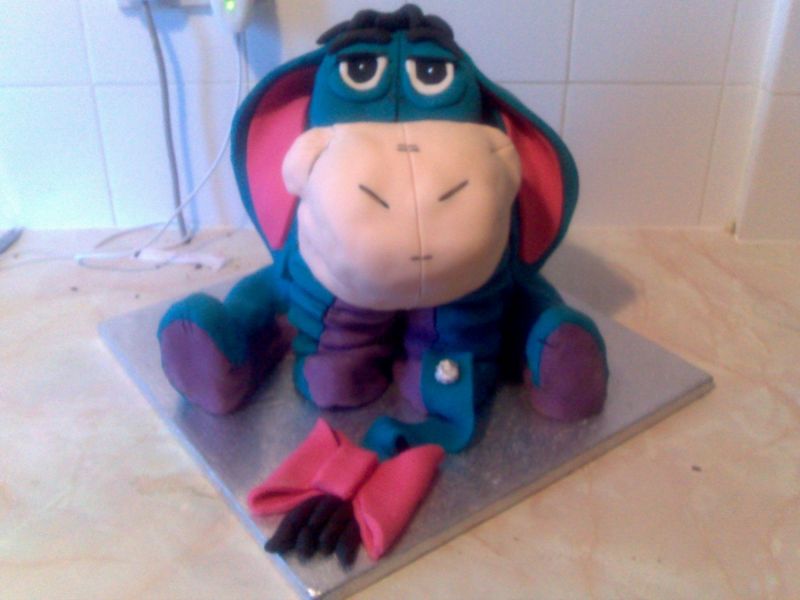
6, Time for the fun bit, the assembly and icing! It is up to you whether you torte and fill the cakes. I torted both of the round cakes but I didnt torte the head as I was afraid it would slip apart! Take the first round cake and place it on the large board. Place a board on top of it and then using the trimmings from the 2 round cakes and the head make another layer of cake. This makes the body taller and looks more proportionate. It also uses all the extra cake up! Put another board on top of this layer and then add the second round cake. On this cake you will need to cut a wedge from the front where the head will sit. Start at about the middle of the cake and cut the wedge being careful not to make the gradient too steep or the cake will slide! My wedge at the highest point was about 1 ½ so there was about 1 ½ left at the front of the cake. Use the wedge you have cut to pad up the shoulders so his head doesnt look like its just been shoved on! Measure and cut the dowels so they go straight through the cake and stick out of the top a bit to hold the head on! I used 3 dowels straight through the body. Attach the hind legs to the side of the cake using buttercream.
7, I used 2½ kg of blue fondant, 1kg of purple, ½ kg of peach, ½ kg of pink and ¼ kg of black. These are approximations so dont follow it to the letter! I made more than this of each colour as I would much rather have too much than not enough! I iced the head first. Roll out the blue fondant large enough to cover the entire head. I wanted to cover the entire thing so the head was less likely to snap in half! Put the head on the middle of the rolled out icing. Pull the icing around it as though you were wrapping a present and cut the edges so they join neatly at the front of the face. This will make the seam down the front of his head. Stick the edges with glue. Fold in the ends, they dont have to be too neat as the peach will cover the one end and the hair and ears the other end. Just as neat as you can get it.
8, Next take the peach. Roll it out. Start at the top of the nose bulge, fold it under his chin and up round the back of his head. Level it with where the front comes to. Take 2 small balls of the peach and put them either side of the cheeks to form the top of the smile. Use the glue to stick everything together nicely. Gently score the smile and line down the front of his head. Follow it on from the one you already have in the blue part.
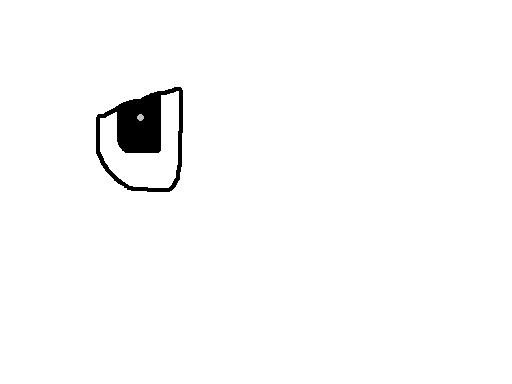
9, Make the eyes by taking a small piece of white fondant and a small piece of black. Roll each of them out and cut the shape below entitled eeyore eye shape. I used a silver ball for the pupil. Remember you can use the first eye as a template for the second and just turn the icing over to get the second eye! Take a small piece of black fondant and roll it flat. Cut little cuts from the centre outwards in it to make the eyelashes. Put it to one side for a minute. Roll a blue sausage and put it around the lower eye to make the lower lid, flattening it down a little. Make another smaller sausage to make the top lid. Put the eyelashes next to the eye and then add the lid so the lashes are sandwiched in between the two. Finally make a sausage in black to make the eyebrow. Do the same for both eyes. Once the icing is dry you can draw the markings on with a black pen or paint them on, whichever you prefer. The head is now done.
10, For the body, I began by icing the purple bits first. You may not be able to see from the picture as his front legs are in the way but eeyores tummy is purple. Ice this first, going up to just below where the shoulders are so you wont be able to see the joins when his heads on. Ice the soles of his feet and carry the icing on up his thigh to join with the icing on his tummy. Its better if you can just use one piece for this if you can as it looks neater. Note from the picture the purple doesnt cover his whole thigh just half way up it.
11, Next you need a huge piece of blue. I aimed to cover as much of the cake as I could with one piece of icing. Imagine you are wrapping him in a huge blanket. You want it to wrap all around his body, over the top of his shoulders to join with the purple, round the front of his body too so you have about an inch showing when you look at the front of him and as much of the legs as you can (you at least need to cover the join of his legs so his legs dont fall off!) My icing made it to where his legs stick out at the front of him so then I took pieces and covered the rest of the leg, covering the joins as best as I could. I guess you could do it all in pieces but I wanted the smooth look. On all the joins to the purple bits put glue so it stays together.
12, The front legs are up next. Grab the cupcakes that you have already chopped in half. Put the foot in place and measure how many of the half cupcakes you are going to need for the legs to be level with the top of his chest. Hold them in place and measure a dowel so it will be long enough to go through all the cakes and also stick out of the top. These dowels will help to support the head. Remember that the flat part if the cupcake will go towards the body, the curved bit will be facing out and will provide the wrinkles in the legs! For the legs I started icing with the blue. Ice around the back of the leg and so you can see the blue partway around the front of the leg on the outside. The inside of the leg will be purple. Ice it pushing the fondant in the gaps in the cupcakes making the folds. Again add glue where blue meets purple. Position in front of the body and add some glue to stick them to the body.
13, Wait for it all to dry. Draw or paint the black lines onto the legs. Now for the really fun part, attaching his head! At this point you should have 3 dowels sticking out of the body and 2 sticking out of the front legs. I pushed one more into the body at an angle as all the others were straight up. Gently place the head on the body and let all the dowels push in. If you are going to travel with this cake I wouldnt put his head on until you get there. I travelled with eeyore and though his head didnt fall off I was very very scared! Another thing to note is once his head was on the front legs pushed down further but this just increased the creases in his legs and added to the cuteness I found!
14, From now on its plain sailing. To make the ears take to large pieces of blue fondant. Cut them to shape and measure them by the head. Once you are happy they are the right size, cut the pieces of pink leaving about ¾ of blue showing all around. Stick the ears to the top of the head using the glue. I didnt dry them before adding them to the head as this allowed the fondant to fall and fold like his ears usually are! For the hair you just need sausages of black fondant coming onto his forehead, though not so long they cover his eyebrows and also a little way down his back. I went just far enough to cover where the head met the shoulders to mask the join.
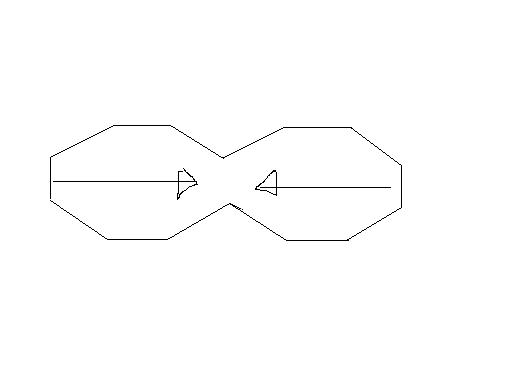
15, Final stage is eeyores infamous tail! Make a bow from the pink fondant. I make a shape like the one below entitled bow and fold as the arrows point. In the gap in the middle I just fold a piece of fondant around itself and put it in the space. Bow done! Use the blue fondant to make the actual tail. Its just really a flat strip. For the silver button bit I just used a piece of aluminium foil rolled into shape and pushed in the icing. Put the bow onto the board and drape the tail going to the foot. Make it go up and down a bit so its not just a straight piece of icing. Finally add some more sausages of black icing coming out of the end of the tail and your done!

thank you so very much for posting this!!! I love your Eeyore cake, and want very much to make one for myself for my birthday this year. ![]() This took a lot of work, both to make and to write out the instructions, and I really appreciate it!!!!
This took a lot of work, both to make and to write out the instructions, and I really appreciate it!!!! ![]() Let us know if you ever do a Pooh or Tigger... I'm sure those would go over wonderfully, as well!
Let us know if you ever do a Pooh or Tigger... I'm sure those would go over wonderfully, as well! ![]()


no problems at all!
if you do decide to try and make one please let me see the pics when your done!
and also if you need any help please dont hesiatate to send me a message, i'll try my best to help where i can!
oh also if anyone wants the instructions emailing let me know (in case you want to print them out?)
Quote by @%username% on %date%
%body%