

How to Make Potted Gumpaste Succulent

These sweet little potted succulents are perfect for adding that extra touch of freshness to dessert time. Whether you're making a succulent-themed cake or serving up little cupcakes, this gumpaste succulent tutorial by Sara Fall details how to create three different gumpaste succulents as well as lovely little pots to display them in.

Succulent Tutorial #1

Materials
- Green sugarpaste/gumpaste (I used Wilton's leaf green to color mine, together with a touch of egg yellow)
- Purple/violet gel colors (or blue and red if you donât have purple)
- Vodka
- White luster dust
- Medium size, soft, fluffy brush
- Small, detail brush
- Ball tool and foam pad
Here is a picture that shows the sizes of brushes used. As you can see, the small brush is tiny!

1. Begin with making an uneven amount of balls in green sugarpaste/gumpaste, all of the same size (I made 11). I thougt it helped to roll out the sugarpaste evenly and use a cutter to make sure they were all of the same size. The size you want is about that of a chickpea, or slightly larger. Put them in a zip-lock bag or similar to prevent them from drying.

2. Roll the first ball into a cone.

3. Flatten it slightly. Pinch the pointy end carefully with your finger tips if it is too rounded.

4. Place the petal on the foam pad and use the ball toll to flatten the round side of the petal a little.

5. Repeat with another petal and place them like in the picture.

6. Repeat step 2-5 with the rest of the petals. Since there is an uneven number of balls, cut the last one in half to make 2 smaller petals. When adding another row of petals, use the ball tool to press down a little in the center (note that this is not the last row of petals!).
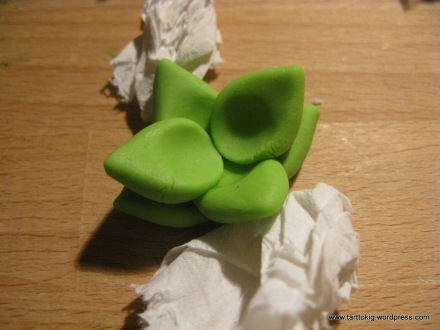
7. Roll two small sausages of sugarpaste/gumpaste and put them in the center. If your flower doesn't hold its shape, support it with tissue paper until it can stand on its own. If it does hold its shape, you can start with the next step immediately.

8. Carefully paint the edges of the petals with the gel colors. Dilute it with some vodka until you have a consistency you like. Youâll need to add vodka continually when painting, since it evaporates quite quickly! (You might notice that Iâve already painted the petals in white, but since I had to repaint later it was unnecessary).

9. Use the small brush to made dots along the edge. Make sure you have very little color on the brush, otherwise the dots will be too large. Add more dots on the outer part of the petals than the inner.

10. When the gel colors have dried, paint the petals with the white luster dust. Use the fluffy brush, and make sure you don't have to much color on it; it might leave you with white spots. Only apply the color to half the petal, the outer part. Adding the white gives you a petal which is a lighter green at the tips and darker towards the center. It also makes the dots pop out less.
Succulent Tutorial #2

Materials
- Dark green luster dust (I used Forest green from Sugarflair)
- Edible glue and brush
- Flower shaper (I used a small cupcake case that I flattened a little)
- Green sugarpaste/gumpaste tinted green
- Medium size fluffy brush
1. Make five balls out of gumpaste/sugarpaste, and then roll them into cones.

2. Make a small circle of the same paste (preferably smaller than the one in the picture!), put it your flower shaper and attach the five cones evenly. Use the glue to secure the pieces.
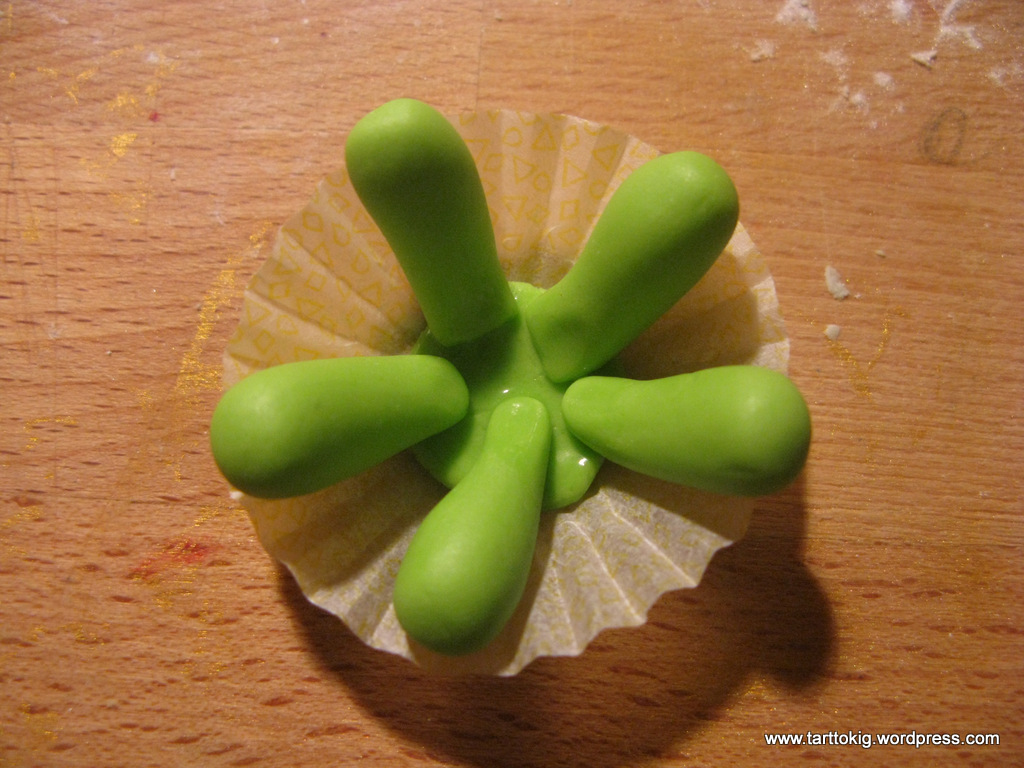
3. Make another five cones, slightly smaller than the first five. Attach them to the flower, in the empty spaces of the first row. Use some tissue to support the second row. Make sure it doesn't look like one row, but two!

4. Make yet another five cones, even smaller than the previous rows and attach them in the spaces between the petals of the second row. Again, use tissue paper as support if necessary. Once the flowers has dried enough to hold its shape; apply petal dust to the tips of the petals.

Succulent Tutorial #3

Materials
- Ball toll
- Edible glue
- Light turquoise gumpaste/sugarpaste
- Medium size, fluffy brush
- Paint brush
- Rust colored luster dust
- Thick foam pad
- White luster dust
1. Roll seven or eight balls of gumpaste/sugarpaste, roll them into cones and flatten to approx. 2 mm.
2. Move them to the foam pad and cup them by pressing down carefully with the ball tool.

3. Arrange the petals in a ring and make a circle out of sugarpaste/gumpaste that matches the size of the circle. Attach the petals to the circle using edible glue.

4. Make another 6-7 petals of the same size and attach them as well. Place them closer to the center than the first row.
5. Make three petals of the same size as previous steps. Arrange them in a circle like in the picture. If your petals are very small, this might be a bit tricky, so consider it when choosing the size of your petals!

6. Make another 4 petals and arrange them like in the picture, and then place the bud you made in step 5 on top. Attach it using edible glue.

7. Now glue the two pieces together and use tissue paper to support the petals.

8. Once the flower has dried, brush white luster dust over each petal, then apply the rust colored luster dust to the tips of each petal.

Succulent Pot Tutorial
Materials
Cake recipe
Gumpaste
Ruler
1. Once the cake is baked and cooled, use a cake leveler to give the cake an even height. Cut along the edges to make them nice and straight. Use a ruler to make sure the width is even, and use a try square if you need to to make sure the corners have a 90° angle.
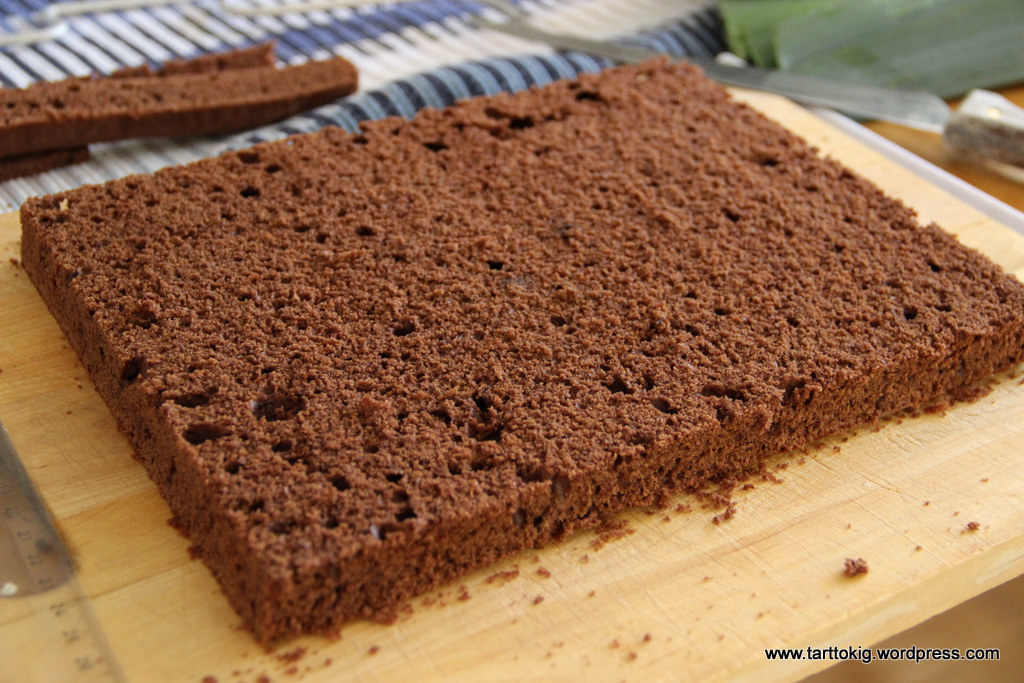
2. I built my cakes with three layers of cake and had planned to make four cakes, so I wanted to make 12 squares. The easiest way was to cut the long side into four and the shorter into three. Measure the length and the width and find a size of square that is possible to make. The width of my cake was 20 cm, and the length 26 cm, therefore I chose to have the sides of my squares 6,5 cm (6,5Ã4=26 and 6,5Ã3=19,5 so this size works).
3. Once youâve figured out the math, cut the cake. Use a ruler to make sure the pieces are even in size.


4. Fill the cakes, place them on a serving platter (making sure there is enough space between them so you can coat and cover the cakes) and coat it in buttercream/ganache.
5. Measure the height of your first cake. If it is a little uneven, measure the highest point.
6. Roll out fondant/marzipan/modelling chocolate large enough to cover the side of the cake. Cut a long strip, approximately 5 mm higher (no more) than the measurement you got in step 5 (use a ruler). Make it long enough so that you are sure it will fit around the cake.
7. Cover the side of the cake with the strip and let the seams meet at the back. Use a scissor to cut of the excess. Smooth the fondant using your hands or a cake smoother.
8. If you made chocolate cake; crumble the excess cake to use as soil. You could also use cookie crumbles, finely chopped dark chocolate etc. Add the soil to the top of the cake. Then add a flower of your choice.
Thanks for looking, and stay tuned for the succulent tutorials!


From tutorial author Sara Fall:
Creating things with your hands has always been a central part of my life. My family has always enjoyed creative hobbies, like building models, weaving and sewing, and I myself have crocheted, made necklaces and cards since childhood. Three years ago for my brotherâs 18th birthday, I decided to try to bake a cake. My first attempt was anything but successfulâ it was a turquoise, lumpy and broken cake, with shaky royal icing shelling and a clumsy flower. Nevertheless I continued and today I have made more cakes than I can count. Iâve learned all I can from cookbooks, television shows and generous bloggers, and I have recently started the blog tarttokig.wordpress.com so I can give back and share with you my experiences and techniques. I love making flowers and always strive to use the tools I already have, and find ways to use everyday objects in creation.


Great tutorial, thanks for sharing!
Great tutorial. I can think of a few friends who would appreciate this since they don't have a green thumb. : )
Thank you,great tutorial!
Wow, Sara. Great cake, but beyond that, I'm very impressed with your command of English. Wish I were as adept at a foreign language as you are!
Thank you so much for sharing. This will be perfect for my dad who loves cacti and succulents.
Beautiful work. You make it look so easy so I must try it soon. Thanks
absolutely loved it... thanx for sharing :)
cannot wait to try this and bring to my friends and family
These are lovely - very stylish and simple. Thank you for sharing!
Hi, great tutorial :-) I've been asked to make succulents for a wedding cake and not sure about how to attach to cake or when to insert wires/ make into bunches etc... Any tips?
Hi, great tutorial :-) I've been asked to make succulents for a wedding cake and not sure about how to attach to cake or when to insert wires/ make into bunches etc... Any tips?
Excellent tutorial! I'm new to CakeCentral and this is amazingly helpful for an upcoming wedding cake that I'm working on!
Excellent tutorial! I'm new to CC and this is amazingly helpful for an upcoming wedding cake I'm working on! Thanks again!
Gorgeous tutorial....know of someone doing succulents for a birthday party....need to give this a try
Thanks for a great tutorial!!
Thank you for this tutorial as I have been wanting to make a succulent cake for my brother who likes cacti. As a trial run I made a couple from Wilton's cutters using gumpaste. Will they hold up as well if I use fondant? My brother likes to eat the fondant flowers I've used on other cakes.
Cathy